How To Get Glue Off Eyelashes?

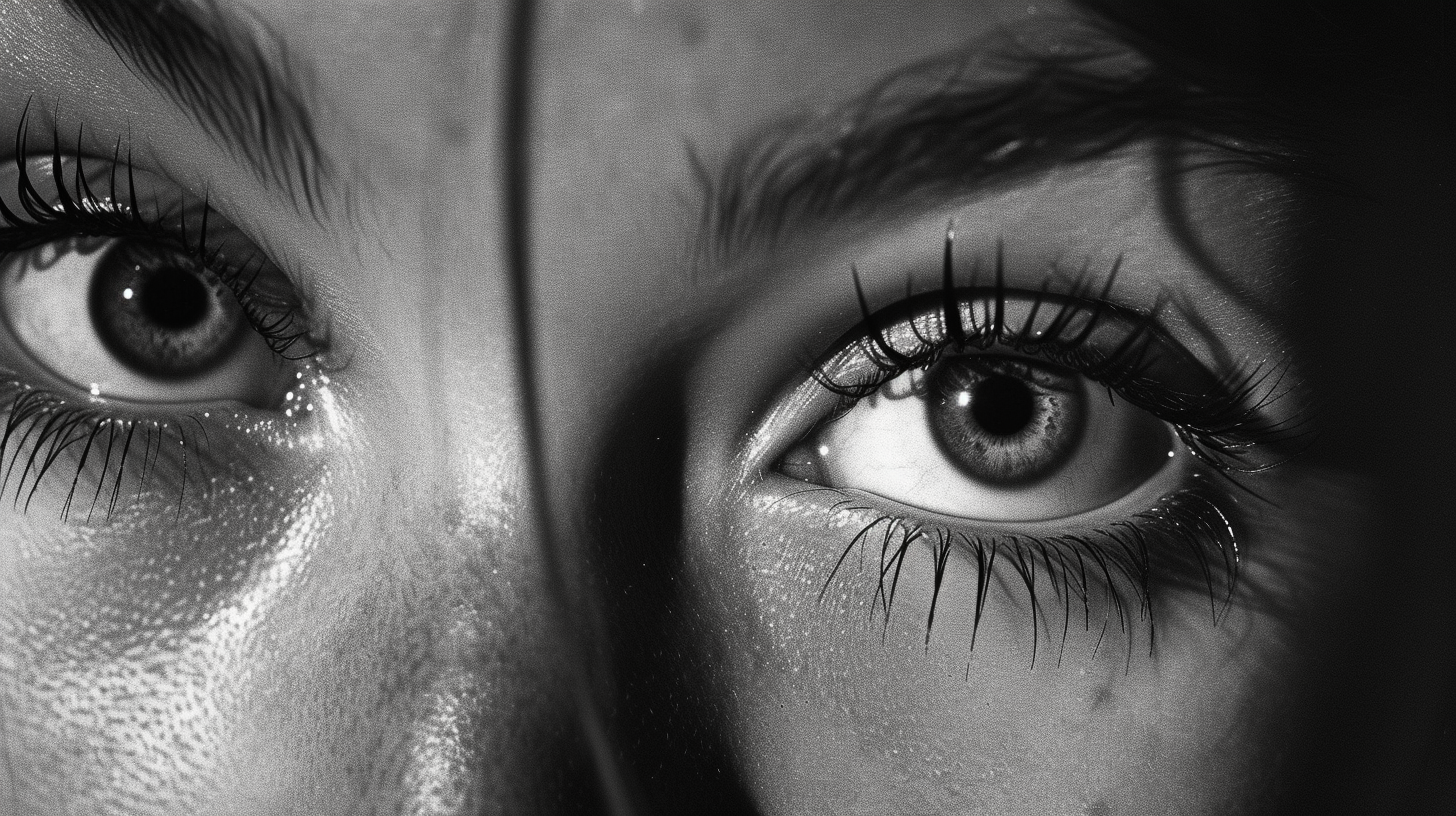
Grasping the gist of getting glue off your eyelashes can seem like a daunting dilemma. You’ve likely encountered the sticky situation of trying to remove eyelash glue without causing damage to your delicate lashes or irritating your eyes.

While the summary provided outlines several methods, such as using an oil-based cleanser or a professional lash glue dissolver, understanding the nuances of each technique is crucial.

Before you resort to pulling or tugging at your lashes, let’s explore these methods in more detail. This way, you’ll be equipped with the knowledge to maintain the health and beauty of your eyelashes, leaving you wondering which method suits your needs best.

How To Get Glue Off Eyelashes?

To effectively dissolve eyelash glue, start by using an eye-safe oil-based cleanser.

This method isn’t only efficient but also gentle on your lashes, ensuring their health isn’t compromised during the removal process.

The first step in getting glue off your eyelashes involves soaking a cotton pad with the oil-based cleanser.

Coat your lashes thoroughly, as this ensures the cleanser can work its magic and dissolve the glue.

Once you’ve applied the cleanser, gently wipe downwards on your lashes. This action helps remove the dissolved glue without pulling or tugging, which could damage your delicate lashes.

It’s a gentle approach that respects the integrity of your natural eyelashes while ensuring the glue is effectively removed.

If you find that there’s still some glue residue clinging to your lashes, don’t worry. Take a cotton swab and gently dab at the remaining spots.

This targeted approach allows for a thorough removal of any stubborn glue bits that didn’t come off with the initial wipe.

Using an oil-based cleanser to remove eyelash glue isn’t only effective but also beneficial for maintaining lash health.

The gentle nature of the oil ensures that your lashes aren’t stripped of their natural oils, which could lead to dryness or breakage.

Plus, the thorough removal of glue residues prevents any potential irritation that could occur if glue remnants are left behind.

DIY Lash Remover Techniques

For those seeking a more hands-on approach, DIY lash remover techniques offer a safe and effective way to free your eyelashes from glue.

This method not only allows you to REMOVE the stubborn adhesive but also ensures that your delicate lashes are treated with care.

Here’s how you can safely dissolve the glue, cleanse your lash line, and reclaim the natural beauty of your eyelashes with ease.

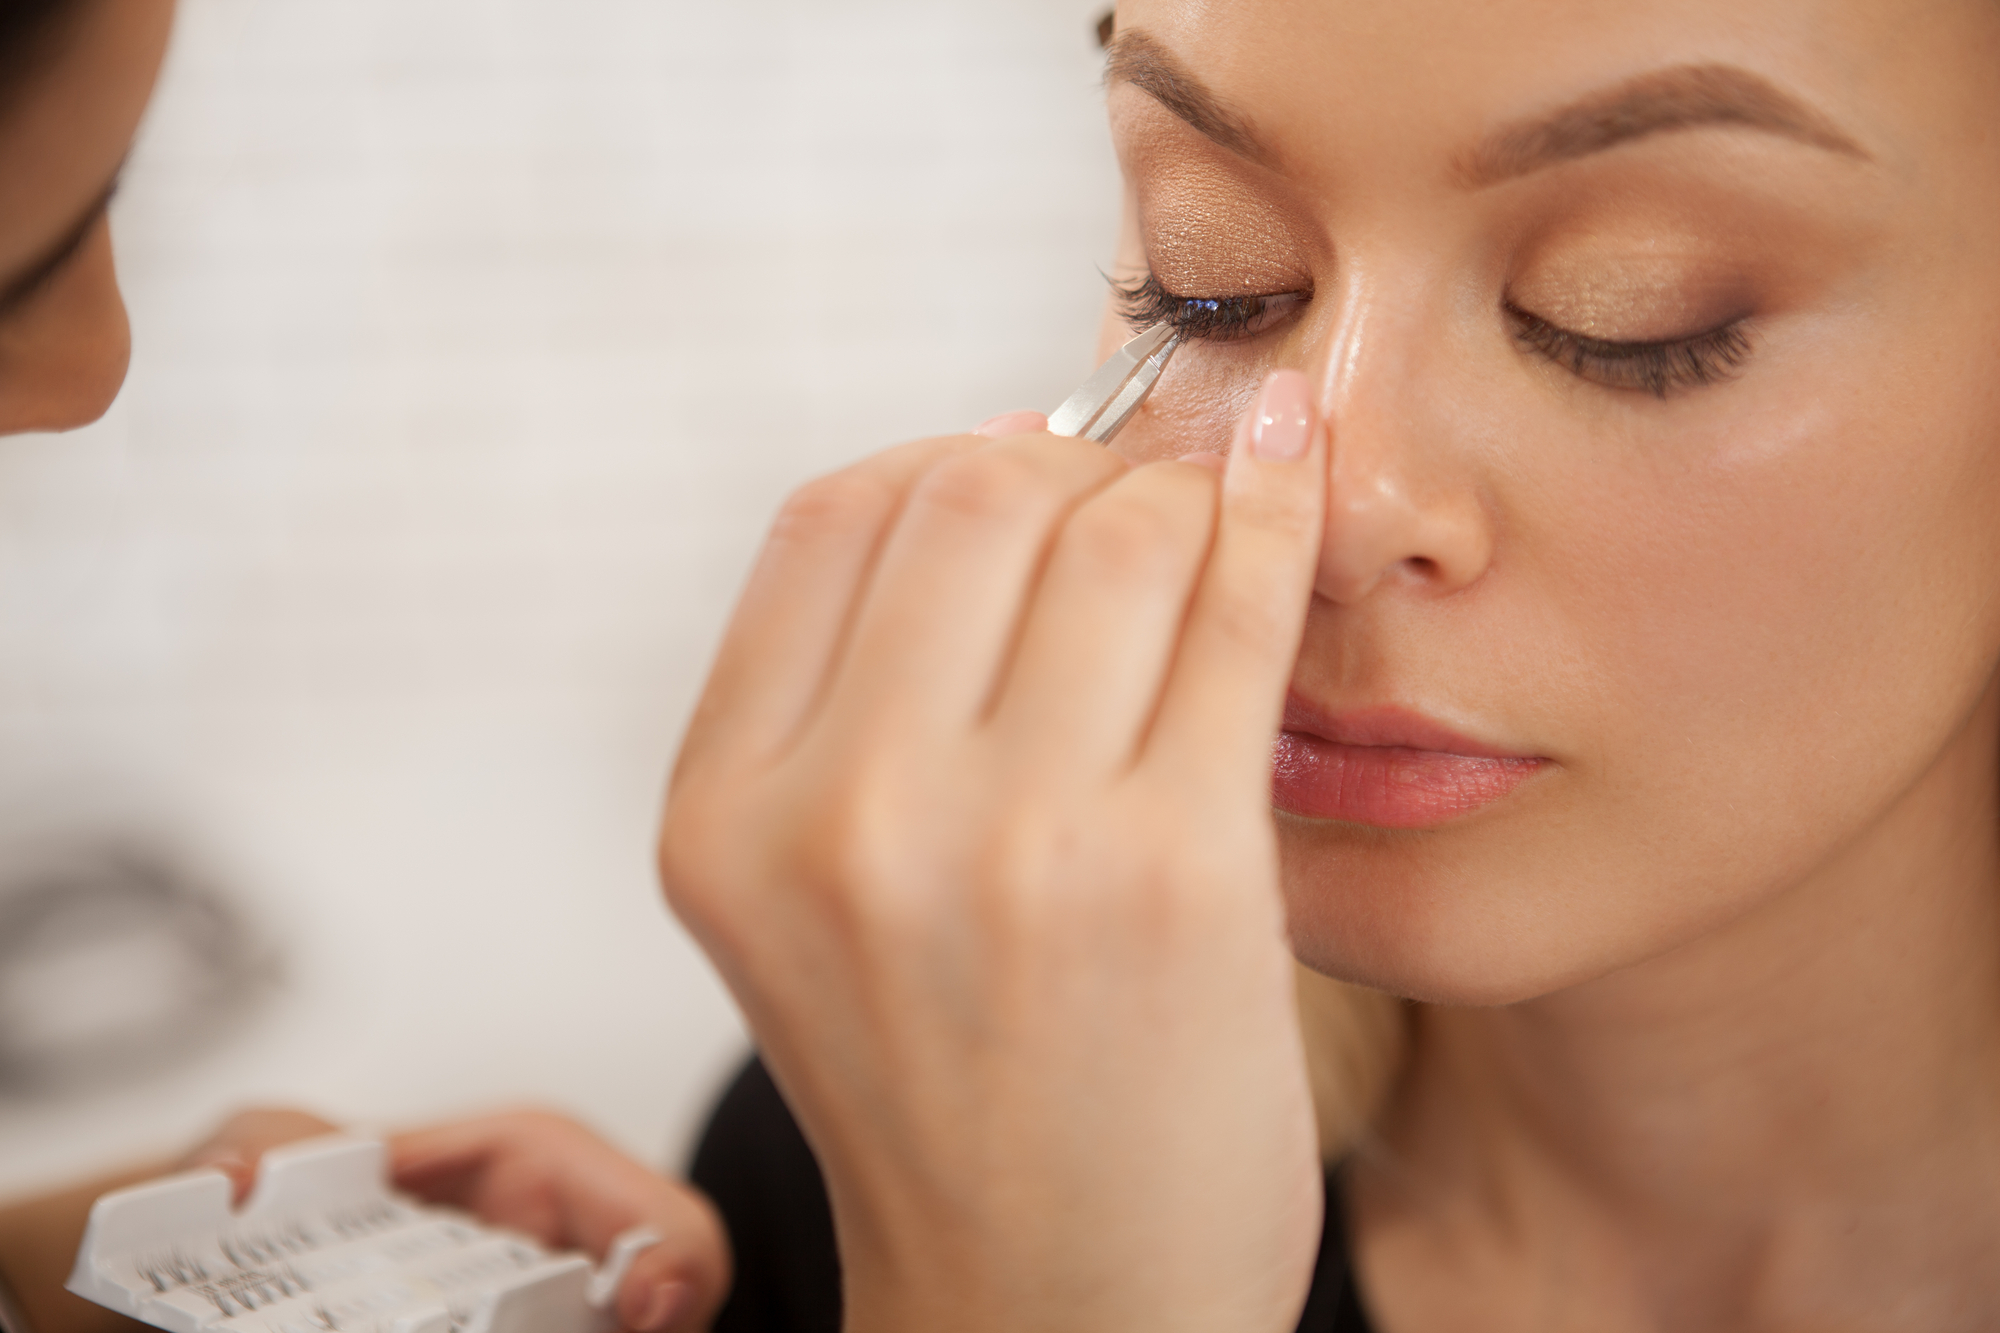
  1. Soak a Cotton Pad in Dedicated Lash Remover: Begin by soaking a cotton pad with a remover specifically designed for lashes. Gently scrub at the base of the lash line to dissolve the glue. This step is crucial as it targets the foundation of the issue, ensuring that the adhesive weakens for easier removal.
  2. Comb Through Lashes for Thorough Coverage: After softening the glue, use the soaked cotton pad or a clean mascara brush to comb through your eyelashes. This ensures every strand is coated with the remover, making the glue come off effortlessly. It’s a gentle way to ensure no lash is left behind, glued and forgotten.
  3. Wipe and Cleanse for a Clean Finish: Finally, wipe down the applicator or comb to remove any lingering glue residue. Then, use a fresh cotton pad to cleanse the area thoroughly. This step removes the remnants of the glue and ensures your eyelids are clean, preventing any irritation or discomfort.

DIY lash remover techniques aren’t just about getting rid of unwanted glue; they’re about doing so safely and gently, preserving the health and beauty of your eyelashes.

Using Eye Makeup Remover To Dissolve Lash Glue

Using Eye Makeup Remover To Dissolve Lash Glue

Switching to an eye makeup remover can effectively dissolve eyelash glue, offering a gentle yet efficient method for clearing adhesive from your lashes.

When you’re trying to remove glue, reaching for the right type of eye makeup remover is crucial. Opt for a gentle, oil-free formula to avoid irritation around the delicate eye area.

This kind of remover is specially designed to tackle the stubbornness of eyelash glue without causing discomfort.

To get started, pour a small amount of the eye makeup remover onto a cotton pad. The key here is to use just enough to dampen the pad without soaking it.

Then, gently press this cotton pad against your lash line. Hold it there for a few moments to let the remover work its magic and dissolve the glue.

This step is vital as it softens the adhesive, making the removal process much smoother and less risky for your lashes.

Next, with a light hand, gently wipe the cotton pad downwards along your lashes. This motion helps to remove the dissolved glue without tugging on your lashes, which can lead to unnecessary lash loss or damage.

Remember, the goal is to treat your lashes with the utmost care to preserve their health and appearance.

For a more comprehensive guide, consider watching a video demonstration on using eye makeup remover to get glue off eyelashes.

Visual representations can offer valuable tips and ensure you’re applying the remover correctly, safeguarding your lashes while efficiently clearing away the glue.

Professional Lash Glue Dissolver

While eye makeup remover is a great starting point, opting for a professional lash glue dissolver can offer an even more effective solution for removing stubborn eyelash adhesive.

Professional-grade dissolvers, such as BL Lashes Gel Remover and Lash Galore Cream Adhesive Remover, are specifically designed to tackle the tough adhesive bonds that keep your false lashes in place.

Their formulations are powerful enough to break down stubborn glue residue quickly and effectively, yet gentle enough to ensure the delicate eye area isn’t harmed in the process.

Using a professional lash glue dissolver isn’t just about safe removal; it’s about preserving the beauty and health of your eyes and lashes. Here are three key benefits you’ll love:

  1. Prevents Damage to Natural Lashes: The gentle formula of professional dissolvers helps to maintain lash health, ensuring your natural lashes remain intact and undamaged.
  2. Ensures Thorough Removal: With the ability to dissolve even the most stubborn glue residue, these dissolvers guarantee a clean slate for your lash line, leaving no residue behind.
  3. Safe for the Delicate Eye Area: Specifically formulated for use near the eyes, these dissolvers minimize the risk of irritation, ensuring a safe removal process.

How To Get Glue Off Eyelashes?

Steaming Off The Glue

Steaming off the glue offers a gentle yet effective method to loosen eyelash adhesive, making it easier to remove without damaging your natural lashes.

This technique doesn’t just soften the glue; it respects the delicate nature of your eyelashes and ensures that the integrity of each lash is maintained throughout the removal process.

Whether you’re looking to take off a full set of falsies or just correct a few misplaced extensions, steaming is a reliable way to achieve your goal without resorting to harsh chemicals or rough handling that could lead to lash loss.

To get started, you can use a hot shower or a dedicated facial steamer to direct steam towards your eyes. Keep your eyes closed to avoid irritation.

The steam helps dissolve the glue’s bond to your natural lashes, making the adhesive easier to remove gently.

Typically, steaming your lashes for about 5-8 minutes should suffice. Here’s a quick guide to understanding why steaming is beneficial for eyelash glue removal:

Benefit Description Technique
Gentle Removal Steam softens glue without harsh chemicals. Steaming
Preservation Maintains the integrity of natural lashes. Gentle
Effectiveness Dissolves adhesive for easier removal. Steam & Remove

If some glue remains after steaming, you can follow up with a mild, oil-based remover for a thorough clean.

This two-step approach ensures that every trace of adhesive is gone, leaving your lashes clean, intact, and free from any potential damage.

Conclusion

So, there you have it! You’re well-equipped to tackle that stubborn glue on your lashes.

Whether you’re reaching for an oil-based cleanser, whipping up a DIY lash remover, using your go-to eye makeup remover, opting for a professional lash glue dissolver, or simply steaming it off, you’ve got plenty of options.

Remember, the key is to be gentle and patient. Don’t tug or pull at your lashes. With these methods, you’ll keep your lashes looking healthy and beautiful.

What Are Cat Eye Eyelashes?

Just as a cat moves with elegance and mystery, cat eye eyelashes offer a subtle allure that transforms your gaze into something mesmerizing.

You’ve likely seen this trend, where lashes graduate from short to long from the inner to the outer corner of your eyes, mimicking the captivating charm of a feline’s eye.

This style not only enhances the natural beauty of your eyes but also adds a dimension of sophistication to your look.

If you’re curious about how this lash style can flatter various eye shapes or the secrets behind its application, you’re on the brink of uncovering a beauty transformation that could redefine your makeup routine.

Defining Cat Eye Eyelashes

Cat eye eyelashes, often referred to as almond or tapered lashes, give your eyes a sharp, angled tip that mirrors the captivating look of a cat’s eye.

This style is all about drama and definition, starting with shorter lashes at the inner corner and gradually lengthening towards the outer corner.

This unique design mimics your natural lash line while emphasizing the outer edge of your eye, creating an illusion of wider, more alert eyes.

As you dive into the world of cat eyelashes, you’ll find they’re not just a one-size-fits-all solution.

They’re incredibly versatile and can be customized to match your personal style and the specific shape of your eyes.

Whether you’re opting for lash extensions or a temporary pair of cat lashes, the key is to enhance your natural beauty by adding length and volume where it counts.

The beauty of cat eyelashes lies in their ability to transform your look with a touch of elegance and sophistication.

They’re perfect for those days when you want to add an extra layer of femininity to your appearance or for special occasions where you aim to leave a lasting impression.

With cat eyelashes, you’re not just applying another makeup accessory; you’re crafting an entirely new look that’s as dramatic and defined as it’s naturally beautiful.

Ideal Eye Shapes for Cat Eye

While certain lash styles mightn’t flatter every eye shape, cat eyelashes offer a versatile option that can enhance a wide range of eye shapes, from almond to monolid.

This lash style, known for its shape of winged elegance toward the outer corner, can dramatically change your look, giving you that coveted cat-eye effect.

Whether you’re considering cat-eye lash extensions or simply applying cat lashes for a special occasion, knowing how they complement your eye shape can make all the difference.

Here are four eye shapes that are particularly ideal for cat eyelashes:

  1. Almond-shaped eyes: You’re in luck if you’ve got almond eyes. The natural elongation and tapering of cat eyelashes will accentuate the outer corners of your eyes, emphasizing your eye shape beautifully.
  2. Hooded eyes: Struggling with hooded eyes? Cat lashes can be your best friend. They create a lifted and elongated effect that counteracts the hooded appearance, drawing attention to the outer corner and giving your eyes a more open look.
  3. Downturned eyes: If the outer corners of your eyes tilt downwards, cat eyelashes can offer a significant lift. This lash style works wonders by lifting the outer corner, creating a more youthful and awake appearance.
  4. Upturned and Monolid eyes: Both upturned and monolid eyes can benefit from the sultry, exotic appearance that cat lashes provide. For monolid eyes, they add a soft yet noticeable enhancement, while upturned eyes receive an extra sultry boost, emphasizing the eye’s natural lift at the outer corner.

What Are Cat Eye Eyelashes?

Application Techniques Explained

Mastering the application of cat eye eyelashes requires understanding the steps involved, from selecting the right curl types to mapping out the lash placement for that dramatic, elongated look.

The goal is to enhance your natural eyes, making them appear more upturned or almond-shaped, mimicking the effect of winged eyeliner without the hassle.

The process begins at the inner corners of your eyes, gradually progressing towards the outer corners. Here, varying lengths come into play; starting with shorter lengths near the inner eye and transitioning to longer lashes as you move outward.

This careful arrangement creates the iconic cat-eye style, drawing attention to the outer edges of your eyes for that alluring, wide-eyed effect.

Lash mapping is crucial in this technique. By planning the placement of up to seven different lengths of lashes, you can achieve a tailored look that complements your natural eye shape.

Whether you have upturned eyes naturally suited for a cat-eye look or you’re aiming to create the illusion of almond-shaped eyes, lash mapping ensures a seamless blend between the extensions and your natural lashes.

Selecting the right curl type, such as the popular C curl, is essential for achieving the desired sharp angle at the tips.

This curl type works brilliantly to elevate the cat-eye effect, providing a significant lift and curve to the extensions, especially at the outer corners.

Various Cat Lash Styles

Exploring the various cat lash styles, you’ll find options ranging from the subtle classic 1D extensions to the ultra-dramatic mega-volume lashes, each designed to enhance your unique eye shape and facial features.

Whether you’ve got round eyes dreaming of a feline flick or you’re looking to give your gaze a dramatic look, there’s a cat lash style waiting to transform your eye look.

Here are four popular styles to consider:

  1. Classic Cat Lashes: Perfect if you’re after a natural yet elevated look. Using 1D extensions, lash artists carefully attach one extension per natural lash, focusing on elongating the corner of the eyes. This style of lash is ideal for those new to eyelash extensions or those desiring a subtle enhancement.
  2. Volume Cat Lashes: For those craving more density and expression, volume cat lashes use 2D to 6D extensions. This technique allows for a fuller, more dramatic look without overwhelming your natural beauty. It’s a great choice if your lashes are naturally sparse or if you’re looking to make a statement.
  3. Mega-Volume Cat Lashes: When you’re ready to go beyond the ordinary, mega-volume cat lashes offer that ultra-dramatic effect. With more than 6D extensions, these lashes promise an unforgettable look, perfect for special occasions or when you simply want to stand out.
  4. Hybrid Cat Lashes: Combining the best of both worlds, hybrid cat lashes mix classic and volume extensions. This results in a wispy, full appearance that beautifully complements any eye shape, especially if you’re undecided between a natural or bold look.

Selecting the Perfect Lash

Selecting the Perfect Lash

Selecting the perfect cat-eye lashes requires considering your unique eye shape and personal features to ensure they enhance and complement your overall appearance.

When you choose a lash, you’re not just picking an accessory; you’re selecting an extension of your natural beauty.

Cat-eye lashes, known for their winged lashes effect, can make your eyes appear wider and more striking.

The goal is to lengthen the eye towards the outer corners, mirroring the natural shape of the eye and adding a mesmerizing lift.

For those with round eyes, long wispy cat-eye eyelash extensions are ideal as they create a stunning contrast and add depth to your look.

However, if you have smaller eyes, overly long styles might overwhelm your features.

It’s all about finding the right balance that complements both your eye shape and personal style, ensuring the extensions enhance rather than overpower your look.

To help you decide, here’s a simple guide:

Eye Shape Recommended Lash Length Additional Tips
Round Medium to Long Choose wispy styles to avoid a heavy look
Small Short to Medium Opt for lighter, fluttery lashes to open up the eye
Almond Versatile Most styles work, but a gradual increase in length accentuates the shape

Conclusion

So, you’ve got the lowdown on cat eye eyelashes, a style that’s all about adding drama and allure to your gaze.

Whether your eyes are round, almond, or anything in between, this lash look can work wonders for you.

From choosing the right length and curl to mastering the application technique, you’re all set to select the perfect lashes.

Remember, it’s all about enhancing your natural beauty and giving your eyes that captivating, feline charm.

Go ahead, embrace your inner cat eye and watch your confidence soar!

Does Crying Grow Your Eyelashes?

A recent survey revealed that 60% of people believe that emotional tears have a positive effect on eyelash growth. However, you may find it intriguing to learn that this is more myth than reality.

While it’s true that your eyelashes may appear longer and more lustrous immediately following a good cry, due to the natural lubrication tears provide, this effect is merely temporary.

The real question then becomes, what actually promotes eyelash growth? Unraveling this mystery might change the way you view those tearful moments and what you do to care for your eyes afterward.

The Science of Tears

Tears, composed of water, fatty lipids, electrolytes, proteins, and mucin, play a crucial role in maintaining eye health by protecting and clearing the eyes of debris and irritants.

When you cry, you’re not just expressing emotions; you’re also engaging in an activity that benefits your eye hygiene.

Crying helps to remove particles and dust that have accumulated, ensuring your eyes remain clean and free from potential harm.

However, it’s a common misconception that the act of crying or the composition of tears can stimulate eyelash growth.

Despite the beneficial properties of tears, they don’t contain ingredients that promote the growth of eyelashes. Their primary function is to lubricate and safeguard the eyes.

This lubrication is essential, as it prevents the eyes from becoming dry and uncomfortable, which can lead to various issues if left untreated.

Moreover, your eyelashes themselves serve as a protective barrier, trapping and keeping dust, debris, and other harmful particles away from the sensitive eye surface.

While crying contributes to eye hygiene by flushing out irritants, it doesn’t directly impact the growth of your eyelashes.

Eyelash Growth Explained

To understand how to achieve longer and healthier lashes, it’s essential to explore the actual mechanics behind eyelash growth.

Many believe that the moisture from tears can promote lash growth, but this isn’t the case.

While it’s true tears can temporarily make your eyelashes appear darker or glossier, they don’t contain ingredients that stimulate lashes to grow. The primary role of tears is to lubricate and protect your eyes, not to enhance the length of your lashes.

If you’re aiming to extend and enhance your eyelashes, relying on the moisture from crying won’t get you there. Instead, consider exploring lash growth serums like Latisse.

These products are specifically designed to promote lash growth by extending the growth phase of the hair follicles.

With consistent use, such serums can lead to noticeably longer and fuller lashes, offering a more effective solution than hoping for benefits from tears.

However, it’s vital to approach lash enhancement with caution. Before starting any new treatment, it’s wise to consult a dermatologist.

A professional can provide personalized recommendations tailored to your needs and ensure that you’re choosing a safe and effective method to achieve longer and healthier lashes.

They can also help you understand the potential risks and benefits of different treatments, guiding you toward the best options for your specific situation.

Debunking the Myth

clarifying misconceptions surrounding myths

Despite popular belief, crying doesn’t actually make your eyelashes grow longer. The idea that shedding tears can lead to longer lashes is a myth without any scientific backing.

Tears are primarily composed of water and lack the necessary ingredients that could stimulate eyelash growth.

You might’ve noticed your lashes looking more prominent after a good cry, but this is due to the temporary visual effect of wet lashes appearing darker and more defined, not any real increase in length.

It’s important to distinguish between the effects of crying and the action of lash growth serums.

Unlike tears, lash growth serums like Latisse contain active ingredients specifically designed to nourish and promote the growth of eyelashes.

The oils and proteins found in your tears aren’t comparable to these serums. They don’t provide the nourishment or stimulation needed for your lashes to grow longer or thicker.

While it’s true that crying can have its own emotional benefits, it’s crucial to understand that these benefits don’t extend to physical enhancements like longer lashes.

The belief that tears can contribute to lash growth is a misunderstanding of how our bodies work. Crying doesn’t deliver any special nourishment or growth factors to your eyelashes.

Benefits of Crying

While crying won’t make your eyelashes grow, it’s worth noting that it does offer several emotional and physical health benefits.

Despite the lack of evidence linking the act of crying directly to the growth cycle of hair follicles and lash length, the benefits of crying for both your body and mind are significant.

Crying, especially when it results from genuine emotions, releases stress and eliminates toxins and stress hormones from your body.

This process helps in stress relief and contributes to your emotional well-being. Additionally, emotional tears are packed with substances that further aid in alleviating stress.

Moreover, crying plays a crucial role in maintaining eye health. It helps remove irritants and debris near the eyelashes, which can otherwise lead to infections or impair vision. This cleansing process is vital for keeping your eyes healthy and functioning properly.

Here’s a table to visualize the benefits of crying:

Benefit Description
Stress Relief Eliminates stress hormones and toxins from the body.
Emotional Well-being Emotional tears contain substances for stress relief.
Eye Health Removes irritants and debris, maintaining eye health.

Real Eyelash Enhancers

lush natural lash growth

You’ve heard myths about crying and lash growth, but let’s explore real solutions for enhancing your eyelashes.

Whether you’re considering natural growth remedies or cosmetic products, there are proven options that can give you the results you’re after.

Latisse, for instance, is a prescription solution that’s been FDA-approved to make lashes longer, darker, and thicker, providing a solid alternative to over-the-counter choices.

Natural Growth Solutions

Exploring natural growth solutions like UKLASH Eyelash Serum can significantly enhance your eyelashes’ length, strength, and overall health.

While we’ve learnt that crying makes no difference in making them appear fuller or grow longer, turning to scientifically formulated lash serums is a game-changer.

UKLASH is packed with vitamins, peptides, and extracts specifically designed to nurture your natural lashes through their growth phase.

Applying it consistently once daily at the root of your upper lashes, you’ll start to see noticeable improvements in 8-12 weeks.

It’s all about keeping your eyes on the prize – or in this case, your lashes. And with a money-back guarantee, it’s clear that solutions like UKLASH are the real deal for anyone looking to enhance their lash game naturally.

Cosmetic Enhancement Options

Beyond natural remedies, various cosmetic enhancement options like Latisse and GrandeLASH-MD offer real solutions for achieving longer, fuller eyelashes.

If you’re seeking more than the temporary effects of emotional outpours, consider these scientifically backed options.

Latisse, an FDA-approved prescription product, has proven efficacy in enhancing lash length, darkness, and thickness.

Meanwhile, over-the-counter serums like GrandeLASH-MD and RevitaLash Advanced harness natural extracts and prostaglandin analogs to stimulate lash growth.

Key ingredients responsible for their effectiveness include:

  • Peptides
  • Vitamins
  • Active ingredients targeting hair follicles

Consult a dermatologist for personalized advice, especially if you’re considering prescription products.

Lash growth serums work by extending the growth phase of your lashes, offering a substantial improvement over natural methods.

Does Crying Grow Your Eyelashes?

Aftercare Tips for Crying

After a good cry, it’s crucial to treat your eyes with care to prevent lash loss and maintain their health.

While the notion that crying can make your eyelashes grow might be more myth than fact, proper aftercare can indeed play a significant role in keeping your lashes looking their best.

First off, resist the urge to rub your eyes aggressively. This common reaction can lead to potential lash loss. Instead, gently dab your eyes with a soft cloth or tissue.

This simple action helps keep your lashes intact, minimizing the risk of them falling out or getting damaged.

Applying a cold compress or using a facial roller around your eyes can work wonders in reducing swelling or redness that often accompanies a good cry.

Besides soothing your skin, this step also helps in keeping the area around your eyes, including your eyelashes, in good condition.

It’s equally important to keep your lashes clean and detangled after shedding tears.

Crying can leave salt residue and other impurities that could clump your lashes together or weaken their structure. Carefully cleaning your lashes and the eye area can prevent these issues.

Lastly, if you were wearing makeup while crying, ensure to remove it thoroughly with a gentle makeup remover. Leaving makeup on can contribute to lash damage and loss.

Conclusion

So, crying doesn’t actually make your eyelashes grow. It might make them look better for a bit, but that’s about it. If you’re after longer lashes, those serums like Latisse are your best bet.

Remember, tears can still be good for clearing out eye gunk and giving you a bit of emotional release. Just don’t expect a miracle growth spurt from your lash line.

And hey, after a good cry, don’t forget to take care of those eyes.

Does Rose Water Expire?

Have you ever wondered if rose water has an expiration date? Does this product ever go bad or lose its potency? If so, how long does the rosewater last before it needs to be replaced?

So, does rose water expire? If you’d like to find out all about rose water, and whether you need to worry about expiration dates, keep on reading…

Benefits Of Rose Water For The Skin?

What Is Rose Water?

Rose water is a natural product derived from rose petals, often used for its soothing and refreshing properties. It is created through a distillation process, which involves steeping rose petals in water and collecting the resulting liquid.

The distillation process allows the essence of the rose petals to be extracted, creating a fragrant and delicately flavored substance known as rosewater.

You can make your own DIY rose water at home if you prefer a homemade rose water touch.

To do this, simply gather fresh rose petals and steep them in hot water. Allow the mixture to cool and then strain it, preserving the liquid.

Rose water is used in various applications, ranging from cooking to skincare, due to its unique properties.

Often combined with a preservative to extend its shelf life, rose water solutions are sold commercially and can be found in many natural products.

When making your own rose water without any preservatives, ensure you store it appropriately to ensure its freshness and effectiveness.

What Are The Benefits Of Rose Water For The Skin?

Rose water is an excellent addition to your skincare routine due to its numerous advantages.

One of the main benefits of rose water is its strong anti-inflammatory properties, which can help soothe skin irritation and redness.

This makes it perfect for individuals with sensitive skin or conditions like eczema and rosacea.

When you use rose water, its anti-inflammatory properties can also potentially reduce symptoms from dermatitis, acne, or psoriasis.

Plus, it can soothe irritation caused by various factors, such as sunburn, dryness, or environmental pollutants.

Regular use of rose water may maintain the balance of your skin’s pH and help control excess oil production.

This keeps your skin fresh and healthy, as well as protects it from the harmful effects of daily exposure to pollution and toxins.

Before introducing rose water into your skincare regimen, it is essential to perform a patch test to ensure your skin doesn’t have any adverse reactions.

To do this, apply a small amount of rose water to your inner forearm or behind your ear and wait for 24 hours. If no irritation or redness occurs, you can safely use it as a tonic for your skin.

Does Rose Water Expire?

Yes, rose water does expire. However, various factors impact the shelf life of rose water, such as the method of production and storage conditions.

The shelf life of rose water largely depends on its production method. Distilled rose water can last up to two years, while rose water made using the simmering method may last for a month or so.

It’s a good idea to store rose water in a cool, dark place, preferably in the fridge. This can help maintain the freshness of the rose water and prolong its shelf life.

Note that rose water doesn’t need to be refrigerated, but doing so can help keep it fresher for longer.

To tell if your rose water has expired, look for changes in its scent or color. If you notice a different, more woody fragrance or the color has shifted, then it’s likely that your rose water has expired.

Although using expired rose water might not be dangerous, it could result in minor skin rashes or a lack of flavor in culinary applications.

To make the most out of your rose water, ensure that you’re using it within its indicated shelf life.

Storing rose water in a sterilized, sealed glass container can also help preserve its freshness and extend its life.

Try to keep your opened rose water away from direct sunlight, as UV rays can cause the rose water to degrade faster.

Even if your rose water hasn’t expired, always check for changes in its properties, such as scent or color, before using it to be on the safe side.

When using rose water, it’s essential to ensure that the product is still within its shelf life, as expired rose water may cause some undesirable effects.

If you happen to use expired rose water, you could experience skin irritation or notice that the product is less effective than usual.

Bad rose water may change in color, turning green or brown over time, and emit a woody fragrance instead of the fresh, floral scent of roses.

This discoloration indicates that the natural chemical balance of the rose water has been altered, which could impact its efficacy.

Before applying any rose water to a large area of your skin, it’s a good idea to perform a patch test.

To do this, simply dab a small amount of the product on a discreet area of skin, like the inside of your wrist, and wait for 24 hours to see how your skin reacts.

If any irritation occurs, it’s best to discontinue use and find a fresh bottle of rose water to use instead.

In case you have expired rose water, you still have some options for its use.

You can mix rose water that has lost its potency with other ingredients, like essential oils, to make a cleaning solution for your home.

Does Rose Water Expire?

How Long Does Rose Water Last Once Opened?

When you open a bottle of rose water, its longevity depends on a few factors. In general, rose water can last up to two years from the time the bottle is opened, as long as it is stored properly.

Close the bottle tightly after each use, and don’t introduce any contaminants to the water by dipping your fingers or foreign objects into the bottle.

To extend your rose water’s freshness, it’s a good idea to keep it in the refrigerator. This will slow down any bacterial growth and maintain its quality for a longer period.

Here are a few indicators to help you determine if your rose water has expired:

  • Smell: Rose water should have a pleasant, floral aroma. If you notice any unpleasant or rancid odors, it’s time to replace your rose water.
  • Color: Fresh rose water is typically clear or slightly tinted. However, if there are any significant color changes, it might be a sign that your rose water has gone bad.
  • Texture: Rose water should have a smooth and consistent texture. If you find any cloudiness or particles floating in the bottle, it’s best to discard it.

How To Store Rose Water To Extend The Shelf Life

Storing your rose water properly can help prolong its shelf life and maintain its freshness. If you have made rose water at home or purchased it from the store, here’s how you can keep the rose water in good condition for as long as possible.

Store your rose water in a cool, dry place, away from direct sunlight and heat. Exposure to direct sunlight or excessive heat can cause the rose water to change color, lose its pleasant fragrance, and even go bad.

A cupboard, pantry, or cabinet located in a cool area of your home is ideal for storing your rose water.

When it comes to the container, you should store the rose water in a glass bottle. Plastic containers can affect the taste and fragrance of the rose water over time.

Make sure the bottle has a tight-fitting lid to prevent any contamination or evaporation. This will help to maintain the freshness of the rose water.

Now, you may wonder if rose water needs to be refrigerated. While it is not necessary to refrigerate rose water, you can choose to store it in the fridge to extend its shelf life even more.

Storing your rose water in the refrigerator can help it last for about 1 to 4 months without going bad. However, you should avoid freezing the rose water as it can change the texture and fragrance.

Lastly, keep an eye for any signs that your rose water has expired. Typically, expired rose water will turn a milky or brown color and may have particles in it.

The fragrance may also change from a pleasant rose smell to a more woody scent. If you notice any of these signs, it’s time to discard the rose water.

How To Tell If Rose Water Has Gone Bad?

When you buy rose water, it might be difficult to determine its freshness or whether it has expired already. Luckily, there are a few key signs that can help you identify if your rose water has gone bad.

First, pay attention to the color of the rose water. Fresh rose water typically has a clear or slightly pink hue.

If your rose water has turned green or brown, this could indicate that it has expired.

Keep an eye on the appearance of the rose water, as its color can give you a considerable hint about its current condition.

Another indicator of expired rose water is its scent. Fresh rose water usually possesses a mild yet delightful floral fragrance.

If you notice an off, wooden-like smell, it may indicate that your rose water has expired. Trust your sense of smell, as it can be a reliable guide to the freshness of your rose water.

To test if your rose water may still be safe for use on your skin, consider performing a patch test.

Apply a small amount to your wrist and wait for 24 hours. If there’s no skin irritation or redness, the rose water is likely fine; otherwise, you might want to discard it.

This simple test can help you determine if your rose water is still suitable for use without risking adverse effects on larger skin areas.

How To Tell If Rose Water Has Gone Bad?

Rose water is a natural product derived from rose petals and often used for its refreshing properties.

The shelf life of rose water depends on the method of production, with distilled rose water lasting up to two years and rose water made using the simmering method lasting for a month or so.

Always store your rose water properly in a cool, dark place, preferably in the fridge, to extend its longevity.

To tell if your rose water has expired, look for changes in color or scent.