Does Brow Tint Stain Skin?

Are you considering brow tinting at a salon, but are worried about whether it will stain your skin? If so, this blog post is for you! I’m going to let you know, does brow tint, even when expertly done with the right technique, stain skin, including your brow hairs?

What can you do to minimize any staining, and what steps can you take to remove brow tint stains from your skin and hairs? So, keep on reading to find out the answers…

Does Brow Tint Stain Skin?

What Is Brow Tint?

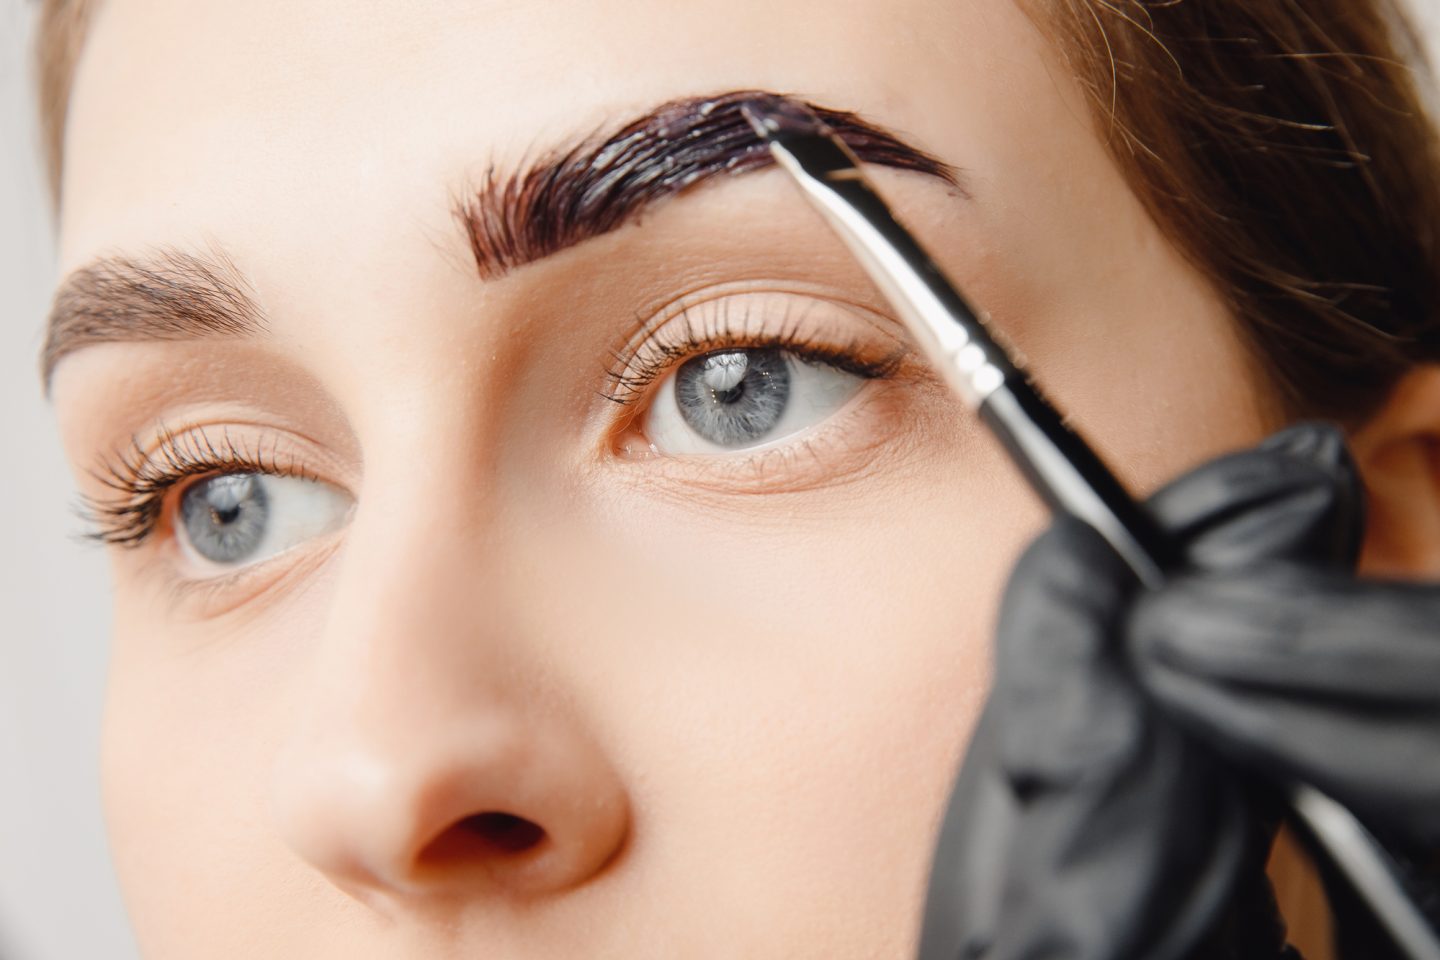
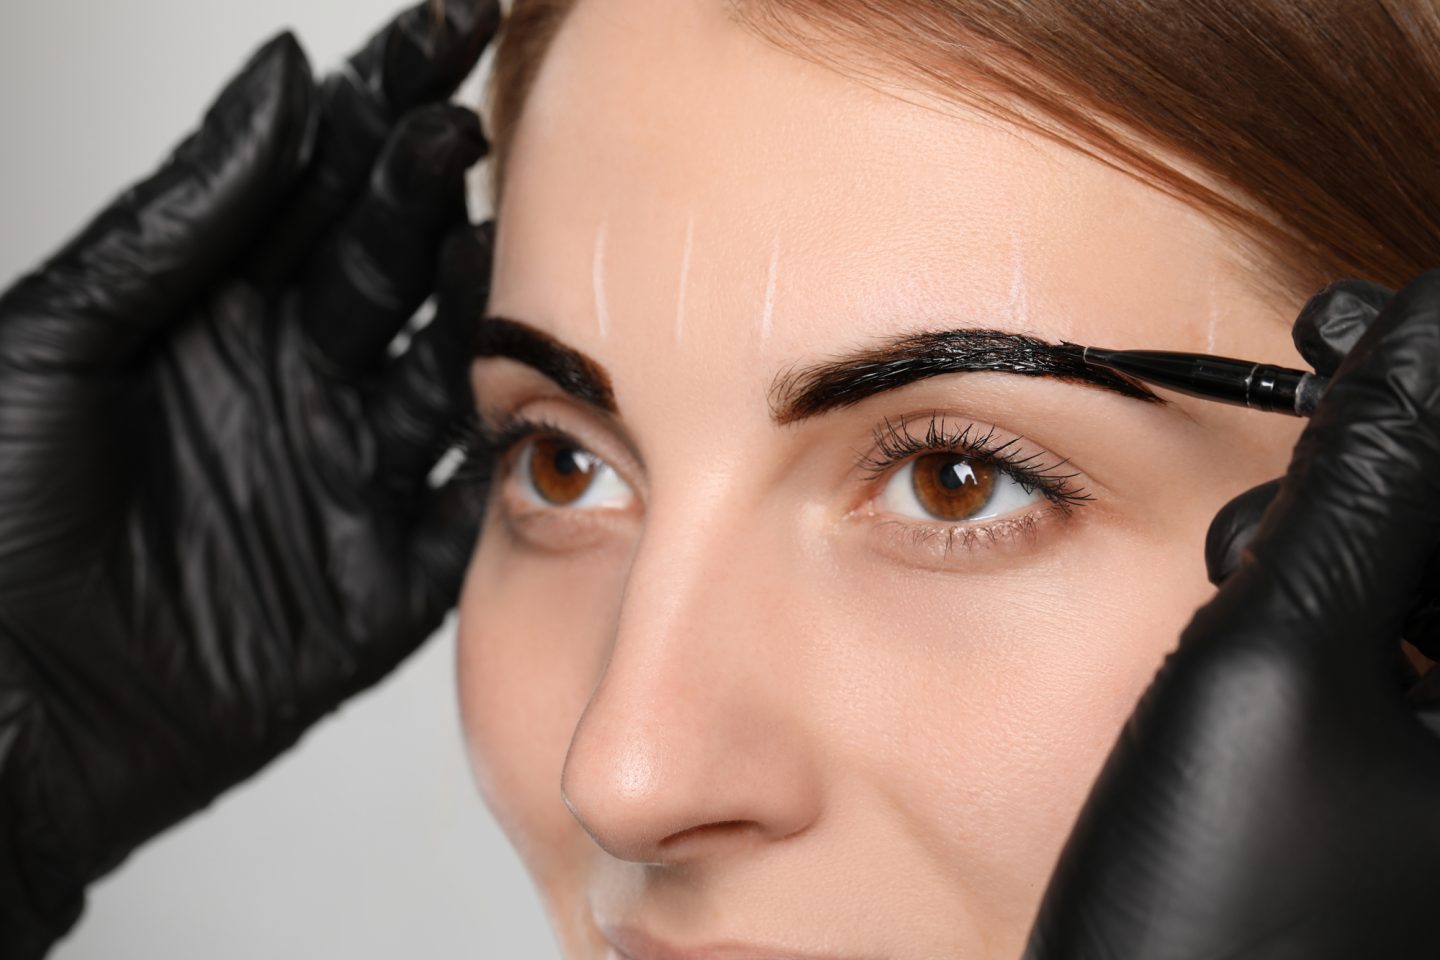
Have you ever wondered what brow tint is and how it works? Brow tint is the process of using semi-permanent dye, administered by a technique involving a brush or applicator wand, to enhance the look of eyebrows.

It’s a great way to get a bolder, fuller look without needing to use eyebrow pencils or other makeup products every day. The process involves carefully tinting each individual brow hair, giving your brow hairs an even tone and texture.

The results usually last for several weeks, depending on your skin type and lifestyle. With this salon-style method, you can change the color and shape of your eyebrows without any permanent changes.

As mentioned before, the technique involves applying a semi-permanent dye onto the eyebrows with a brush or applicator wand. This dye will coat each individual hair strand, giving them an even tone and texture.

Depending on the desired effect, you can opt for lighter colors such as brown or black, or more dramatic shades like purple or red, all with the expertise of salon professionals.

Once applied, the dye will take around 15 minutes to set before washing off with water, leaving your brow hairs enhanced.

Does Brow Tint Stain Skin?

The answer depends on how long you keep the dye on and the type of dye being used.

Most brow tints are semi-permanent, so they usually don’t leave a stain on the skin unless left for too long. However, some dyes may contain ingredients that can cause staining.

The best way to avoid staining is to conduct a patch test before applying dye to your eyebrows at the salon, as this’ll allow you to identify whether your skin is sensitive to any of its ingredients.

It’s also important to follow instructions carefully, as leaving it on too long can cause staining even if it’s generally safe for your skin.

Applying Vaseline petroleum jelly around the eyebrow area can help protect against staining in case you accidentally leave it on longer than recommended.

If you do end up with a stain from brow tinting, there are ways to remove it safely without damaging your skin or natural coloration.

A gentle cleanser should be enough in most cases, but some people find that using lemon juice helps fade stains more quickly and effectively.

You can also try an exfoliating scrub specifically formulated for face and body use twice per week until the stain fades away completely.

Stains from brow tinting aren’t common and are easily avoided by conducting a patch test beforehand and following instructions carefully during application – but if one does occur, there are plenty of home remedies that can help remove it safely without damaging your complexion or natural look.

How Long Does Brow Tint Stains Last?

If you’re wondering how long the stain will last from your eyebrow tinting, it may depend on how sensitive your skin is and the type of dye used. Generally speaking, if your skin isn’t too sensitive, the stain can last for several days.

The majority of tints will fade within two to four days. Some people have reported that their tint, even from a salon, lasted up to a week. Others who’ve tried henna tints may notice that the stain lasts for several weeks.

When it comes to eyebrow tinting, or even more permanent options like microblading, there are many factors at play that can affect how long the stain lasts.

It’s important to consider how often you wash and exfoliate your face, as well as what kind of skincare products you use. Ones labeled as “smudge-proof” may interfere with the results.

All these things can influence how quickly the dye fades away. Certain dyes tend to be more resistant than others, so it’s best to discuss with your brow artist beforehand to get an idea of what sort of longevity the result you should expect.

It’s also important to note that some people may experience staining on their skin due to an allergic reaction or sensitivity issue with a particular ingredient in the dye. In this case, it would be wise to avoid using such products altogether and find alternative ways of achieving desired results.

If aftercare instructions aren’t followed properly, there’s a chance that staining could continue beyond its expected timeline, so make sure you know all about proper maintenance before getting started.

Removing an unwanted stain from your skin after a brow tint can be tricky, but luckily, there are some solutions that can help.
How To Remove Eyebrow Tint Stains From The Skin

How To Remove Eyebrow Tint Stains From The Skin

To start off, it’s important to remember that the kind of dye used for your brow tint will determine what methods you can use to remove the stain.

For example, vegetable dyes tend to come off easily with warm water and soap without much effort. However, if a smudge-proof or permanent dye like microblading was used, then more intensive removal techniques may be necessary.

The main thing to keep in mind when removing a brow tint stain is that you need to do it as soon as possible before the dye has time to set into the skin.

One way of doing this is by using oil-based makeup removers like coconut or olive oil. They are gentle yet effective at breaking down the molecules in the dye, so they slide away from your skin with ease.

You could also try using baby oil or even rubbing alcohol as they both contain active ingredients that will help break apart stubborn dyes quickly and efficiently.

It’s also important to note that some people have reported success with using natural remedies such as lemon juice and baking soda paste.

Apply it directly onto the stained area for about 10 minutes before washing it away with warm water and soap.

This method works best on fresh stains but might require multiple applications depending on how long it’s been since you had your brows done.

Lastly, if all else fails, you should consider seeing a professional who can help guide you on how best to remove any last traces of color without damaging your delicate facial skin.

To avoid any unwanted staining, it’s important to take preventive steps before and after your brow procedure.

Tips for Avoiding Stain Damage

First, ensure to choose a skilled and experienced brow artist who’s been properly trained in tinting brows and can provide excellent results.

Ask questions about the products they use and make sure they’re using quality, smudge-proof products that won’t cause skin irritation or staining.

After your appointment, you should also take precautions to prevent fading or staining of the color. Be sure to avoid direct sunlight for at least 24 hours following your appointment.


Sun exposure, riddled with chemicals that can be harsh on your skin, can quickly fade the color from your eyebrows obtained through the tinting process. The exposure can even cause burning or discoloration of the skin around them.

You should also stay away from saunas and steam rooms for a few days after having your brows tinted as these environments can easily fade colors over time. Your dedicated brow technician can guide you on maintaining the longevity of your tint.

It’s also important to keep your brow area clean by washing with mild soap twice daily. This helps reduce chances of bacteria building up on the surface of your skin, which could lead to infection or staining down the road. Using the right formula that doesn’t disrupt the tint is crucial.

Use gentle moisturizers specifically formulated for sensitive areas like eyebrows as this’ll help keep them hydrated without causing irritation or discoloration. The right formula plays a key role here.

As your brow technician may suggest, you should tint your brows every 3-4 weeks to keep them looking full and fresh. This is a great way to add definition and shape without having to use makeup every day.

Tinting is also semi-permanent, so once you find the right shade for your skin tone, you’re all set! You can even re-apply the formula yourself if needed at home or in between appointments.

How Often Should I Tint My Brows?

Make sure to check out reviews before picking a tint as some can fade too quickly or stain your skin due to the chemicals used in the process.

Yes, brow tint is generally safe to use. However, it’s important to choose a quality product, perhaps suggested by your brow technician, and follow the instructions carefully.

Make sure the dye you select is specifically formulated for use on eyebrows, as other types of dye may interfere with the tinting process causing irritation or skin reactions.
What Are the Side Effects of Brow Tint?

Is Brow Tint Safe to Use?

It is wise to perform a patch test 24 hours before each application to ensure there won’t be an adverse reaction due to the chemicals involved. When applied correctly, brow tint can give your eyebrows a beautiful, natural-looking color that lasts for several weeks.

You may be wondering about the side effects of brow tinting. Generally, it’s a safe procedure if done correctly and with quality products, especially under the guidance of a seasoned brow technician.

However, there are potential risks involved, such as skin irritation, redness or swelling around the eyes, and darkening of the skin in some cases – a factor to consider during the tinting process.

What Are the Side Effects of Brow Tint?

If you’re prone to allergies, make sure you consult your doctor before proceeding with brow tinting. Some people may also experience temporary staining on their skin due to the chemicals in the formula, that can take several days to fade away.

Are you considering brow tinting but worried about whether it will stain your skin? If so, don’t worry! In most cases, brow tint, if applied by a trained brow technician using a well-suited formula, won’t leave any noticeable staining on the skin.

However, some people may experience a temporary discoloration, perhaps due to the chemicals involved, that can take several days to fade away.

Summary

It’s important to always perform a patch test before applying any dye and follow directions carefully during the tinting process to avoid any unwanted staining or irritation.

It’s also wise to protect your skin from direct sunlight after having your eyebrows dyed as this can cause fading and even burning of the nearby skin area – a situation to be mindful of in the post-tinting process care.

If you do end up with a stain, there are numerous ways of removing it without damaging your natural complexion or coloration – your brow technician can guide you on this.

To avoid any undesired staining in the future, make sure to choose quality products and have your eyebrows done by an experienced practitioner every 3-4 weeks for best results. After all, the formula and the expertise of your brow technician are key components of a successful brow tinting process.

If you do end up with a stain, there are numerous ways of removing it without damaging your natural complexion or coloration.

To avoid any undesired staining in the future, make sure to choose quality products and have your eyebrows done by an experienced practitioner every 3-4 weeks for best results.

Can You Perm Bleached Hair?

Do you want to give your bleached hair long-lasting texture and volume? Have you been wondering can you perm bleached hair?

I’m going to share the basics of perming bleached hair and how to do so safely. Learn more about how to maintain healthy, textured hair with reliable perm techniques that keep your hair looking its best.

Can You Perm Bleached Hair?

What Are The Different Types Of Perms?

There’s a wide variety of options out there, each with its own unique set of benefits and maintenance requirements. Knowing the right type for you will help you achieve the desired results while keeping your hair healthy and beautiful.

One major benefit of getting a perm is the added volume and texture it provides, perfect for those with naturally straight or limp hair.

There are several types of perms to choose from, including spiral perms, body wave perms, root lift perms, and digital (hot) perms.

Spiral perms create tight corkscrew curls that fall in defined ringlets, while body wave perms give gentle waves for a more natural look.

Root lift perms focus on adding volume at the roots rather than curling the entire length of the hair.

Digital (hot) perm technology uses heat-activated chemicals to create long-lasting soft curls or waves without damaging your hair as much as traditional methods might.

When selecting a perm type, consider factors such as your hair type, face shape, and desired level of commitment when it comes to perm maintenance – some require more upkeep than others.

Maintaining your new curls is essential for them to look their best and last as long as possible.

Proper perm maintenance includes using sulfate-free shampoos and conditioners specifically designed for chemically treated hair.

These products will keep your hair moisturized without stripping away essential oils or causing color fade.

Assessing the Condition of Your Hair

Before deciding to perm your bleached hair, you need to assess its current condition and determine if it’s healthy enough for the treatment.

A thorough hair evaluation is essential in ensuring damage prevention and maintaining the overall health of your hair.

Begin by examining your hair strands for signs of dryness, brittleness, or breakage. If you notice any of these issues, it may be best to hold off on perming until your hair has regained strength and vitality.

To further evaluate the state of your bleached hair, perform a strand test by taking a small section of hair and gently stretching it between your fingers.

Healthy hair should have some elasticity and return to its original length after being stretched. However, if the strand snaps easily or feels gummy when wet, this could indicate that your hair is too damaged for perming at this time.

It’s also essential to consider how recently you’ve bleached or colored your hair; ideally, you should wait at least two weeks before undergoing any chemical treatments.

Understanding the Bleaching Process

You’ll find various types of bleaching methods to choose from, so it’s essential to select the right one for your hair type and desired results.

Bleaching techniques can range from traditional full-head bleach applications to more specific techniques such as balayage, highlights, and lowlights.

Full-head bleach applications involve applying the bleach mixture to your entire head of hair, while balayage is a freehand technique where the stylist applies bleach only to certain sections of your hair for a natural-looking effect.

Highlights and lowlights focus on lightening or darkening smaller strands of hair throughout your head, giving you added dimension without drastically changing your overall color.

When choosing the right bleaching technique for you, consider factors like your current hair color, texture, and desired result.

For instance, if you have dark hair and want a drastic change to blonde or platinum shades, a full-head application may be necessary.

However, if you’re aiming for a subtle sun-kissed look or simply want to add some depth to your existing color without making a dramatic change, techniques like balayage or highlights might suit better.

Color maintenance is essential in any bleaching method you choose; regular touch-ups help maintain an even tone and minimize damage.

Consulting with an experienced hairstylist can help determine which method will work best for achieving the look you desire while minimizing potential damage to your hair.

Effects of Bleaching on Hair Health

When deciding to bleach your hair, it’s key to understand the potential impact on your hair’s health and how proper care can mitigate these effects.

Bleaching involves applying chemicals that penetrate the hair shaft and strip away its natural color by breaking down melanin.

This process can cause several negative side effects, such as dryness, brittleness, and hair breakage.

Bleached hair is more susceptible to environmental damage like sunlight and pollution – factors that contribute to color fading.

To minimize these adverse effects of bleaching on your hair, make sure you invest in quality hair care products formulated specifically for chemically treated or damaged hair.

Use a sulfate-free shampoo with nourishing ingredients like keratin or argan oil to gently cleanse without stripping the natural oils from your strands.

Regular deep conditioning treatments into your routine to replenish lost moisture and help strengthen weakened bonds within the hair structure.

Finally, protect your hair from excessive heat styling by using thermal protection sprays or opting for lower-heat tools whenever possible.

How Does Hair Perming Work?

How Does Hair Perming Work?

At its core, perming chemistry revolves around breaking down the disulfide bonds in your hair that hold its natural shape and then reforming them into new bonds that create the desired curls or waves.

This is achieved by using curl enhancing products that contain chemicals like ammonium thioglycolate or sodium hydroxide, which help to break down these bonds and allow for a more flexible state where curls can take form.

Once those bonds are broken and your hair has been wrapped around perm rods to achieve the desired curl pattern, a neutralizing agent is applied to reform the disulfide bonds and lock in the new curly or wavy structure.

Can You Perm Bleached Hair?

While it’s possible to perm bleached hair, you must take extra care and follow risk mitigation techniques to ensure that your hair remains healthy and strong.

Educate yourself on perm precautions to help you make informed decisions about whether to proceed with this double chemical process.

You should be aware of the potential risks involved with perming bleached hair:

  • Increased hair breakage: Both perming and bleach weaken the protein structure of your hair, making it more susceptible to breaking.
  • Dryness: The chemicals used in both processes strip away natural oils from your scalp and strands, leading to dryness.
  • Uneven curl patterns: Perms might not take evenly on previously bleached sections due to varying porosity levels in different parts of your hair.
  • Damage recovery time: If any damage occurs during the process, it will take longer for your hair to regain its strength and health compared to if only one process had been done.

To minimize these risks, consider consulting a professional hairstylist with experience working with chemically treated hair.

They can assess the condition of your hair and recommend appropriate treatments or alternative styling options that are better suited for you.

It’s essential that you follow their guidance on aftercare routines such as deep conditioning treatments, regular trims, heat-styling precautions, and using products specifically formulated for chemically treated hair.

Factors to Consider Before Perming Bleached Hair

One essential aspect to consider is hair porosity, which refers to how well your hair can absorb and retain moisture.

Bleached hair tends to have higher porosity levels due to the damage caused by the bleaching process. This means that perming bleached hair may lead to further damage and breakage if not done carefully or professionally.

Another factor you need to think about is perm maintenance. Perms require proper care and attention, such as regular deep conditioning treatments, using sulfate-free shampoos, avoiding heat styling tools, and sleeping on silk pillowcases.

All these measures help maintain the curls’ definition while preventing frizz and dryness.

Bleached hair already needs extra care due to its fragile state; adding a perm will increase this need for diligent upkeep significantly.

When contemplating whether you should get a perm on your bleached hair, consulting with an experienced hairstylist is a must.

They’ll assess your hair’s condition, porosity level, elasticity, and overall health before determining if perming would be suitable for you or potentially disastrous.

Tips for Minimizing Damage When Bleaching Permed Hair

Minimizing breakage and maintaining the integrity of your hair is crucial when combining these two chemical processes. With proper care and attention, you can achieve a stunning look without sacrificing hair health.

  • Choose the right stylist: Make sure to select an experienced hairstylist who specializes in both bleaching and perming. They should assess your hair’s condition, elasticity, porosity, and history before proceeding with any chemical treatments.
  • Deep conditioning: It’s vital to incorporate regular deep conditioning treatments into your routine before and after perming bleached hair. These treatments will help restore moisture, improve elasticity, reduce frizz, and strengthen your hair.
  • Take it slow: Allow at least two weeks between bleaching and perming sessions for optimal results. This waiting period gives your hair time to recover from the initial bleach treatment while also allowing you to maintain its strength through regular conditioning.

Always be gentle when handling your newly permed hair – avoid brushing or pulling on wet hair as this can lead to further damage. Instead, use a wide-tooth comb or fingers to detangle gently when necessary.

Invest in high-quality products specifically designed for chemically treated hair – don’t skimp on shampoos, conditioners or styling products that cater explicitly towards maintaining the health of bleached or permed hair.

Alternative Styling Options

You might want to explore alternative styling options for your bleached hair if you’re hesitant about perming!

There are many alternative treatments and creative updos that can give your hair a fresh, new look without the potential damage or commitment of a perm.

Whether you’re looking for a temporary change or something more long-term, these alternatives can help satisfy your desire for a new hairstyle while keeping your bleached hair in great condition.

Alternative Treatments Creative Updos
1. Hair extensions 1. Braided crown
2. Keratin treatments 2. Top knot bun
3. Deep conditioning masks 3. Twisted chignon
4. Clip-in accessories 4. Faux hawk braid
5. Temporary hair color 5. Sleek ponytail

Experimenting with different styling techniques and products is an excellent way to keep things interesting while avoiding any unnecessary damage to your already processed hair.

How Long Should I Wait Between Bleaching and Perming My Hair to Minimize Damage?

How Long Should I Wait Between Bleaching and Perming My Hair to Minimize Damage?

To minimize damage between bleaching and perming your hair, it’s crucial to give your hair ample time for bleach recovery. Ideally, you should wait at least two weeks to allow your hair to regain its strength and moisture.

Meanwhile, focus on deep conditioning treatments and protein masks to restore your hair’s health.

If you’re eager for a new look but hesitant about potential damage, consider exploring perm alternatives like heatless curls or temporary styling products that can help you achieve similar results without further compromising your hair’s integrity.

Are There Specific Types of Perms that Are Safer for Bleached Hair, Such as Acid or Alkaline Perms?

When considering bleach resistant perms, it’s essential to understand the differences between acid and alkaline perms.

Acid perms tend to be gentler on your hair due to their lower pH level, making them a safer option for bleached hair.

Alkaline perms, on the other hand, have a higher pH level and can cause more damage to already compromised hair.

However, keep in mind that no perm is entirely risk-free for bleached hair; always consult with a professional stylist who can assess your hair’s condition and recommend the best course of action.

Can I Use At-Home Perm Kits on Bleached Hair, or Should I only Have It Done by A Professional?

While you might be tempted to use an at-home perm kit on your bleached hair, it’s essential to consider the risks involved when using perm solutions, as part of the perm process.

At home, you might not have the necessary expertise or products tailored specifically for treated hair, which can lead to further damage or uneven results.

Seeking professional help offers numerous benefits: experienced stylists possess the knowledge and skill set to assess your hair’s condition, choose the appropriate perm solution (acid or alkaline), and monitor the process closely.

How Can I Maintain the Health of My Hair After Perming Bleached Hair?

Maintaining the health of your permed and bleached hair is crucial to keep it looking fabulous and strong.

Start by using hair masks and hydrating treatments into your routine at least once a week, focusing on nourishing ingredients like keratin, argan oil, or coconut oil.

Don’t forget to use sulfate-free shampoos and conditioners specifically designed for chemically treated hairstyles, to avoid stripping away essential moisture.

Minimize heat styling as much as possible, allowing your hair to air-dry whenever you can, and invest in a good-quality heat protectant spray when using styling tools.

Regularly trim split ends every 6-8 weeks, and consider taking supplements like biotin or collagen to support healthy hair growth from within.

Summary

Perming bleached hair can be risky – but with proper care and precautions, you can achieve a stunning new look without compromising your hair’s health.

Before deciding to perm your hair, assess its condition and determine if it’s healthy enough for the treatment.

Consult an experienced stylist who can recommend the best approach for achieving results while minimizing potential damage.

It’s essential to use sulfate-free shampoos and conditioners specifically formulated for chemically treated hair, along with regular hydrating treatments, heat protection products, and trims. Proper care is key in preventing further damage to your already processed hair.

Can You Straighten A Perm?

Have you ever wished that you could undo a perm? Or maybe you have wondered if it was even possible to straighten a perm so that it looks like its natural state? Can you straighten a perm?

I’m going to share the tips and tricks on how to successfully and safely straighten a perm without damaging your hair. So read on to learn more…

Can You Straighten A Perm?

What Exactly Is A Perm?

A perm hairstyle includes a chemical treatment applied to hair that results in long-term waving or curling. The salon process involves wrapping sections of damp hair around rods and treating them with a solution of ammonium thioglycolate, and is done by your hairstylist.

This perm solution causes the disulfide bonds in the cortex of the hair to break down, allowing for rearrangement into curved shapes when heated with a blow dryer.

Once cooled, small plastic rods are clamped around each section for up to half an hour while setting lotion is applied.

After rinsing out the lotion, neutralizing shampoo is used to stop the reaction and reset the new shape by rebuilding some of those broken disulfide bonds, getting rid of any kinks.

In general terms, a perm kit will create long-lasting curly patterns that can last anywhere from 6 months to a year, depending on your hair type and amount of care taken afterward.

The aftercare plays a large role in how long perms last; too much heat styling can break down those reshaped curls faster than desired, so it’s recommended you avoid this wherever possible.

As well as ensuring you keep up with regular trims every 4-6 weeks or so both pre- and post-perm to prevent split ends from causing further damage.

Can You Straighten A Perm?

As you consider straightening your perm, it’s important to be aware of the potential risks and limitations involved.

Straightening a perm can cause damage to your hair, especially if it’s not done properly or done too frequently.

There’s always the possibility of uneven results, leaving some parts of your hair with different textures than others.

Potential Damage to Hair

Straightening a perm can really wreak havoc on your hair, potentially causing breakage and fried strands.

Hair breakage is often caused by chemical overload, which happens when you subject your hair to multiple chemical treatments in a short period of time.

Perming your hair already involves using strong chemicals that alter the structure of your hair, and applying heat or more chemicals to straighten it afterward can lead to weakened strands that are prone to snapping off.

Not only does this result in unwanted frizz and split ends, but it could also cause irreversible damage if done repeatedly.

To avoid such damage while still achieving a straight look, consider giving your hair some much-needed rest between treatments.

Opt for gentler methods of straightening like using large rollers, wrapping techniques, or investing in high-quality ceramic flat irons with adjustable temperature settings that minimize heat exposure.

You may also want to consult with a professional stylist who can assess the condition of your hair and recommend the best course of action for maintaining its health while achieving the desired style.

Possibility of Uneven Results

Attempting to flatten permed hair may lead to uneven results. This can cause some parts of your hair to appear sleek while others remain wavy or curly.

The uneven texture is due to the varying levels of chemical penetration and the method used when straightening your hair.

Perms work by breaking down the bonds in your hair and reforming them. This results in a more permanent change.

Attempting to reverse this process through heat styling tools or other methods can yield an unpredictable outcome.

To minimize the risk of uneven results, you should approach reversing a perm with caution and patience. Instead of trying to force your hair into submission with high heat tools like flat irons, consider using gentler techniques like blow-drying with a round brush for a smoother finish.

However, bear in mind that even these milder methods don’t guarantee perfectly straightened hair after having a perm.

At-Home Straightening Techniques

At-Home Straightening Techniques

While you might be tempted to try at-home straightening techniques, it’s essential to know the potential risks and proper methods for achieving your desired results.

Home remedies and DIY techniques may seem like a cost-effective and convenient solution, but they can lead to uneven results or even damage your hair.

Before attempting any at-home methods, consider the following points:

  • Types of at-home straightening techniques
  • Heat styling: Using flat irons or blow-drying with a round brush
  • Hair products: Straightening serums, creams, or sprays that claim to help reduce frizz and flyaways
  • Natural remedies: Ingredients like coconut oil or milk, which are said to have natural straightening properties

Each method has its pros and cons; heat styling can cause heat damage if not done correctly, whereas hair products may weigh down your hair.

As for natural remedies, their effectiveness varies from person to person.

To avoid causing further damage to your perm-treated hair while trying these at-home straightening techniques, follow these tips:

  1. Use a high-quality heat protectant spray before applying any heat tools.
  2. Invest in good quality flat irons that allow you to control the temperature settings.
  3. Start with the lowest possible heat setting on your flat iron and gradually increase as needed.
  4. Be gentle when handling your hair – avoid tugging or pulling too hard during the process.
  5. Keep in mind that overusing chemical-based products could lead to product buildup on your scalp.

Professional Straightening Treatments

Considering a professional straightening treatment? It’s a fantastic option to ensure your curls are transformed into sleek, smooth hair safely and effectively.

Professional treatments can provide longer-lasting results than at-home techniques, and they’re performed by experienced stylists who know how to handle various hair types.

Two popular options for professionally straightening permed hair are chemical relaxers and keratin therapy.

Treatment Description
Chemical Relaxers A powerful solution that breaks down the bonds in curly hair, allowing it to be restructured into a straighter form. Typically lasts 6-8 weeks before touch-ups are needed.
Keratin Therapy A semi-permanent treatment that infuses the hair with keratin, a protein naturally found in hair. Reduces frizz and curliness for up to 2-4 months.

While both chemical relaxers and keratin therapy can effectively straighten permed hair, it’s important to consider which option is best suited for your specific needs and preferences.

Chemical relaxers offer more permanent results but may cause damage if not applied properly or maintained correctly.

Keratin therapy is gentler on the hair but requires more frequent touch-ups as the effects gradually wear off over time.

Maintaining Straightened Hair

Now that you’ve explored professional straightening treatments as an option to straighten your perm, it’s essential to know how to maintain your newly straightened hair.

Proper maintenance will keep your hair looking fabulous and help prevent damage and prolong the results of the treatment.

Maintaining the ideal balance of moisture in your hair is crucial for keeping it healthy, soft, and frizz-free. To achieve this, use products specifically designed for chemically treated or straightened hair.

These products will help with moisture retention while protecting your strands from heat styling tools like flat irons or blow dryers.

Also, remember to deep condition at least once a week to replenish any lost moisture caused by the treatment process.

Try using a leave-in conditioner after washing and towel drying; this will further aid in hydration and detangling.

Humidity can be a nightmare for those with straightened hair since it often leads to unwanted frizz and curliness creeping back in.

To combat this issue, invest in humidity protection products such as anti-frizz serums or sprays that create a barrier between your hair and the environment.

Apply these products evenly throughout damp or dry hair before stepping outside on humid days – you’ll notice a significant difference!

Another great tip is reducing heat styling as much as possible; excessive heat not only damages hair but can also make it more susceptible to humidity-induced frizz.

Embrace air-drying whenever possible or use low-heat settings when styling tools are necessary.

Alternatives to Straightening a Perm

Straightening precautions should always be considered, as the chemicals used in perms can weaken the hair shaft and make it more susceptible to breakage.

So, let’s explore some perm alternatives that will allow you to change up your style while keeping your HAIR healthy.

  1. Deep Conditioning Treatments: Regular deep conditioning treatments can help improve the texture and manageability of permed hair. These treatments work by penetrating the hair shaft and providing much-needed moisture and nourishment, making it easier to style your hair without having to resort to heat styling tools.
  2. Braids or Twist-Outs: If you’re looking for a low-maintenance alternative, try braiding or twisting your damp hair overnight (or even just for a few hours) before taking them out when dry. This technique will give you soft waves with less frizz, providing an effortless yet polished look.
  3. Using Heatless Styling Tools: There are various heatless styling tools available on the market designed specifically for creating different hairstyles with minimal damage to the hair – such as flexi rods, foam rollers, and satin-covered sponge rollers.

How Long Should I Wait After Getting a Perm Before Attempting to Straighten It?

How Long Should I Wait After Getting a Perm Before Attempting to Straighten It?

To maintain the integrity of your fresh perm and avoid any potential damage, it’s essential to practice proper post-perm maintenance.

You should ideally wait at least two weeks before attempting to straighten your hair.

This waiting period allows your hair to adjust and recover from the chemical process it has undergone, reducing the chances of causing further damage or weakening its structure.

During this time, focus on nourishing and hydrating your hair with quality products specifically designed for permed hair.

Can Certain Hair Types or Textures Have Better Results with Straightening a Perm?

Certain hair types and textures can yield better results when attempting to straighten a perm. Texture effects play a significant role in how well your hair will respond to the straightening process.

For instance, if you have naturally coarse or curly hair, it might be more challenging to achieve a sleek, straight look compared to someone with fine or wavy hair.

Hair elasticity is another crucial factor to consider; healthy and strong hair tends to bounce back from chemical treatments more effectively than damaged or brittle strands.

Are There Any Specific Hair Care Products that Can Help in The Straightening Process for Permed Hair?

Perm reversal treatments and straightening techniques work together to give you the smooth, sleek look you desire.

Start by using a deep conditioning treatment to restore moisture and elasticity to your strands.

This will prime your hair for the next steps, which may include heat-based methods like flat ironing or blow-drying, or chemical relaxers if necessary.

Always remember to use heat protectant sprays before applying any heat to your hair, and follow up with a good-quality hair serum for added shine and frizz control.

How Do I Know if My Hair Is Too Damaged to Undergo a Straightening Treatment After a Perm?

To determine if your hair is too damaged for a straightening treatment after a perm, you’ll need to pay close attention to the signs of damage.

Look for excessive breakage, split ends, and a rough or brittle texture – these are all indicators that your hair may not be in the best condition to undergo further chemical treatments.

Instead of risking more harm, consider focusing on hair damage prevention through nourishing treatments like deep conditioning masks and protein-rich products.

Meanwhile, explore natural straightening alternatives such as using a wide-tooth comb while blow-drying or trying heatless methods like wrapping your damp hair around a headband overnight.

Summary

Can you straighten a perm? Yes, it is possible to straighten a perm. However, it is important to understand the risks and take proper precautions to avoid damage and uneven results.

Professional treatments such as chemical relaxers or keratin therapy can offer longer-lasting results but may cause more damage than at-home techniques.

Alternatives such as deep conditioning treatments, braiding your hair, or using heatless styling tools are gentler on the hair and will help maintain the health of your hair while changing up your style.

Before attempting any method of reversing a perm, make sure you have an understanding of the potential risks involved and consult with a professional stylist for advice.

Can You Tan After Laser Hair Removal?

Have you ever wished for a more permanent solution to hair removal that would allow you to go days, weeks, or even months without having to shave, while avoiding skin damage?

Laser hair removal may be the answer – but with it comes the question: can you tan after laser hair removal?

I’m going to share how laser hair removal affects tanning. Among the potential concerns are possible reactions and the safety of your skin.

Read on to learn about if and how you can successfully tan after laser hair removal…

Can You Tan After Laser Hair Removal?

What Happens During The Laser Hair Removal Process?

The laser hair removal process is a relatively safe, quick and permanent way to get rid of unwanted body hair, reducing habitual actions that cause skin damage.

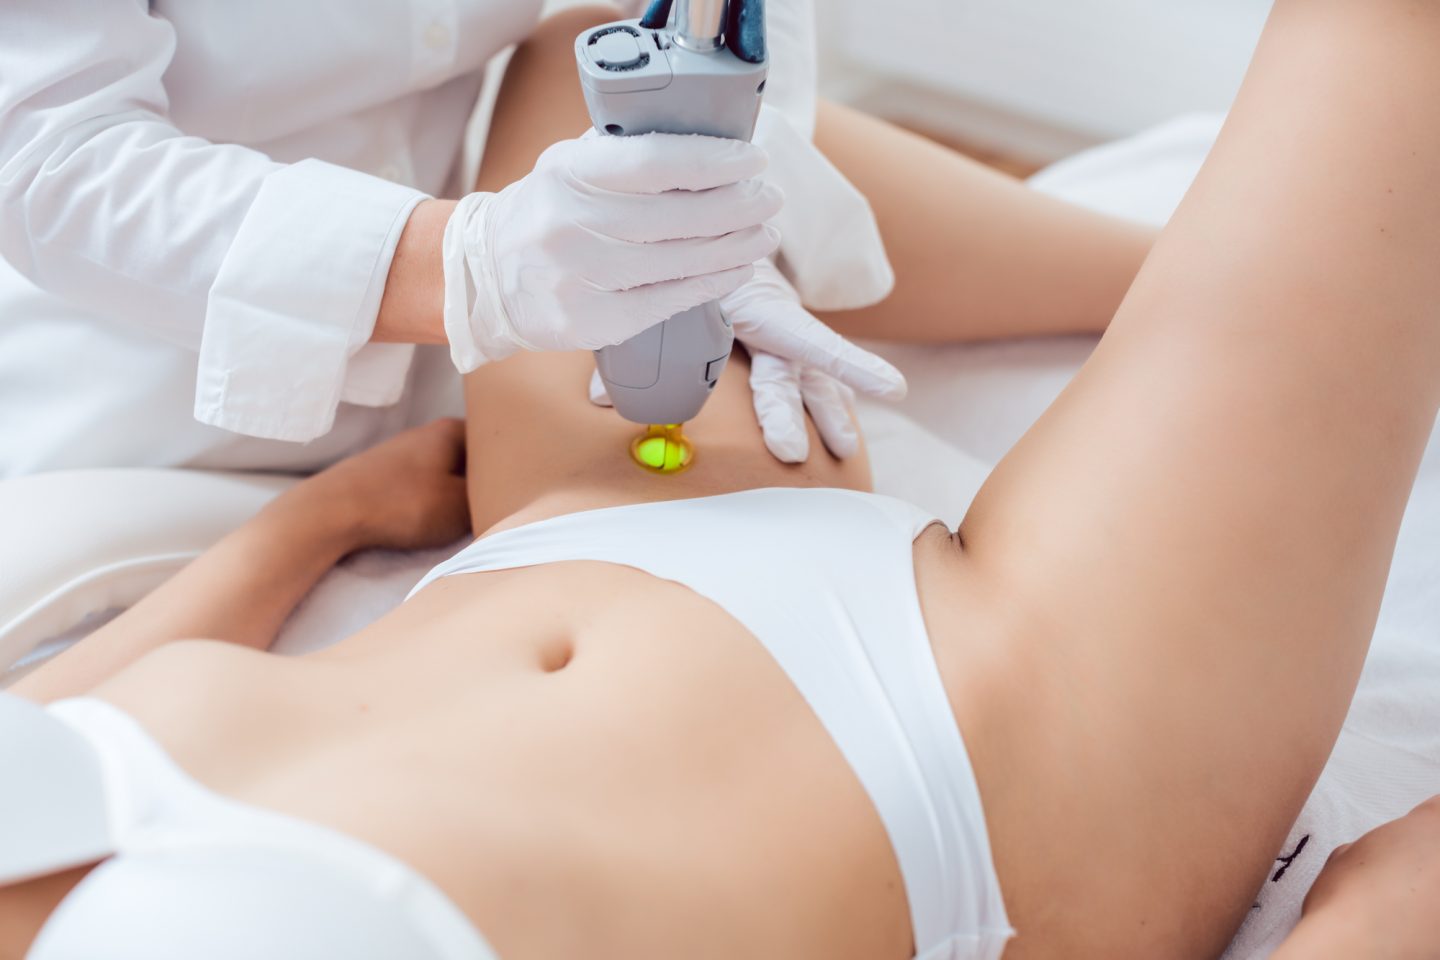
During the procedure, a technician directs a beam of highly concentrated light into areas containing unwanted hair, causing reactions within the follicles that prevent future growth.

This light is absorbed by the melanin in the hairs resulting in thermal damage—the heat from this process destroys the follicles which prevents future hair growth.

Before any laser treatment session, clients are asked to thoroughly cleanse and exfoliate their skin and to avoid sun exposure for several weeks before avoid exacerbating any potential skin damage or adverse reactions.

Since some lasers may be attracted to pigmentation, technicians may also ask patients to avoid tanning or using self-tanner, as part of the consultation.

Before beginning the procedure, technicians will determine which type of laser best suits their client’s needs and then adjust its settings accordingly based on factors such as the color of their skin and type of hair being treated.

Once prepared, technicians will move an applicator over sections of skin that contain unwanted hair, allowing pulses of light from the device to pass through while periodically cooling its surface with a built-in refrigeration system designed explicitly for this purpose.

Depending on how much hair needs removing and other factors such as skin sensitivity, multiple treatments may be required, but due to improved technologies, results tend to occur faster than traditional methods used before lasers became popular for this purpose.

Can You Tan After Laser Hair Removal?

The laser hair removal process makes your skin more sensitive to sunlight, which can lead to complications like hyperpigmentation, increased skin damage or even burns.

Even on cloudy days, UV rays can penetrate through and cause reactions in your skin, so don’t skip the sunscreen.

Keep in mind that tanning after laser hair removal is strongly discouraged. You’ll need to wait at least two weeks post-treatment before considering any form of tanning, be it natural or artificial.

This period allows your skin to heal properly from the laser treatment without additional stress caused by UV exposure, further helping to prevent skin damage.

Hydrating your skin is also an essential part of post-procedure care. Opt for a good moisturizer that suits your skin type and apply it religiously to keep the treated area soft and smooth, which can help avoid reactions and contribute to your overall consultation goals.

Avoid hot showers or baths for a day or two post-treatment as they could exacerbate irritation, potentially leading to skin damage.

Remember these guidelines for optimal results from your laser hair removal treatment while maintaining healthy and radiant-looking skin throughout the process as part of your comprehensive consultation.

Risks of Sun Exposure Post-Treatment

Don’t let the sun’s harmful rays undo all the hard work and effort put into your recent treatment. It’s important to understand that tanning after laser hair removal can be risky for your skin, causing reactions and exacerbating skin damage.

The procedure makes your skin more sensitive to sunlight, which increases the likelihood of developing sunburns or hyperpigmentation, due to skin damage. Always seek professional consultation post-treatment to ensure safety and achieve the most effective results. Direct exposure to UV rays post-treatment might cause redness, inflammation, or even burns on already sensitive skin. This could lead to scarring, which complicates the treatment plan and also affects the health and growth of the hair follicle.

Besides discomfort, it also delays your healing process significantly and might lead to unwanted side effects like dark spots or skin discoloration. These effects might interfere with the treatment plan and result in permanent scarring if not managed appropriately.

Furthermore, if you tan too soon after a laser hair removal session, you risk reducing its effectiveness because the contrast between hair and skin color is less distinct. This can impede the laser’s ability to target the hair follicle accurately and thereby diminish the results of your treatment.

To protect yourself from these risks, consider using a broad-spectrum sunscreen with an SPF of at least 30 whenever you step out in the sun post-treatment. This will shield your hair follicles and limit any potential scarring or redness.

You should also avoid direct sun exposure as much as possible during peak hours – typically between 10 am and 4 pm. The sun’s rays are at their most potent during these times, and your skin, especially the hair follicles, might be more susceptible to damage post-treatment.

After a laser hair removal treatment, your skin is more sensitive to the sun’s harmful UV rays and can easily get burned or damaged. Scarring could result, disrupting your treatment plan and impacting the health of the hair follicle.

Expert Recommendations on Sunbathing

Here are three guidelines to remember:

Wait before you tan: Allow your skin some time to heal post-treatment. This usually takes about two weeks, but it may vary depending on individual skin types and sensitivity. Giving your skin time to recover also prevents scarring and ensures the hair follicle is not adversely affected.

  1. Use sunscreen religiously: Even if you’re just running errands outside, slather on a broad-spectrum sunscreen with an SPF of at least 30. Remember, reapply every two hours for optimal protection. This habit will protect your skin, prevent scarring, and support your treatment plan.
  2. Opt for self-tanners: If you’re eager to achieve that bronzed look immediately after treatment, consider using self-tanning products instead of natural sunlight or tanning beds.
  3. Remember, protecting your skin from the sun’s harmful rays isn’t just about maintaining the effectiveness of your laser hair removal sessions—it’s also about preventing long-term damage like premature aging, scarring, and skin cancer.

Slathering on sunscreen isn’t simply a summer ritual, but it’s rather an essential practice to safeguard your skin from harmful UV rays, even when they’re not visibly harsh. This is especially beneficial for the treatment plan and maintaining the health of the hair follicle.

Expert Recommendations on Sunbathing

Effective Sunscreen Practices

Firstly, use a broad-spectrum sunscreen that blocks both UVA and UVB rays with at least SPF 30 protection. This high-grade protection is especially necessary for people who’ve undergone laser hair removal due to the skin’s increased sensitivity and the need to safeguard the hair follicle.

Apply the product generously 15 minutes before going outside to give it enough time to absorb into your skin properly. This step is critical in preventing UV ray-induced scarring and maintaining your laser hair removal treatment plan.

Furthermore, don’t forget about reapplication! Even the best sunscreen needs refreshing after two hours of sun exposure or immediately after swimming or excessive sweating.

You might think you’re covered for the day with just one application in the morning, but that’s not exactly how it works.

Remember also that no corner of your exposed skin should be left unprotected; pay attention to areas like ears and back of hands which are often overlooked but equally prone to sun damage. Wearing protective clothing can provide additional defense against harmful rays.

After laser hair removal, your skin may be more sensitive than usual. Therefore, it’s important to protect it from the sun’s harmful rays, following your treatment plan diligently to avoid potential scarring and to support healthy hair follicle growth.

Maintaining Healthy Skin Post-Treatment

Give your skin a break; avoid sun exposure for at least two weeks after treatment. This helps prevent any pigmentation changes or burns and protects the hair follicles while avoiding any risk of scarring.

Keeping your skin hydrated is another vital step in aftercare. Apply a gentle moisturizer regularly, especially on the treated areas. This helps soothe any irritation and promote healing, preventing scarring and supporting the treatment plan by maintaining the health of the hair follicle.

Also, remember that exfoliation plays an integral role in maintaining smooth skin post-laser hair removal. It helps to eliminate dead skin cells that could obstruct new growth from the hair follicle and form potential scar tissue.

About a week after treatment, gently exfoliate dead skin cells away with the use of an approved product to help new ones regenerate better. It’s like giving your skin a fresh start, similar to the transformative glow some clients observe after professional UV light treatment in a salon.

When you feel like getting some color back into your life, consider using fake tan products rather than exposing yourself directly to the sun or tanning beds, which are harmful for the skin. An alternative can also be laser treatments, that offer a more controlled tanning environment unlike traditional tanning salons.

But remember to treat your skin gently, so wait at least 2 weeks post-treatment before attempting this too. After all, rushing the process could do more harm than good, same as exposing your skin to UV light too soon after receiving laser treatments.

It’s crucial to wait at least two weeks after your laser hair removal session before you can start using self-tanning products. The wait time is similar to when you go to a salon for a spray tan after UV light laser treatments.

How Soon After Laser Hair Removal Can I Start Using Self-Tanning Products?

This allows your skin time to heal and reduces the risk of irritation or discoloration. Remember, your skin can be sensitive post-procedure, just like how skin behaves after laser treatments at the salon, so it’s best to give it a bit of breathing space before introducing anything new.

Yes, laser hair removal can affect your skin’s natural tanning. The procedure targets melanin, the pigment responsible for both hair color and skin tan. Thus, it may interfere with your ability to get a natural tan for a while post-treatment, just like traditional salon-based UV light tanning sessions.

Can Laser Hair Removal Affect the Natural Tanning of My Skin?

Also, your skin might be more sensitive to the sun after laser hair removal, increasing the risk of sunburn. It’s recommended you avoid excessive sun exposure or use strong sunscreen immediately following treatment, just like you would after UV light procedures at the salon.

Yes, laser hair removal treatment can increase your skin’s sensitivity to the sun. It’s advised to avoid sun exposure before and after your treatments for a period of 6 weeks or as recommended by your dermatologist, similar to the guidelines often shared at a salon after UV light-based treatments.

Does Laser Hair Removal Treatment Increase My Sensitivity to The Sun?

Does Laser Hair Removal Treatment Increase My Sensitivity to The Sun?

This is because the lasers target melanin, which can make your skin more susceptible to sun damage. Hence, when you’re out in the sun post-treatment, equip yourself with a good sunscreen, just like you would when lounging at the salon under UV light.

Yes, tanning before your laser hair removal session can impact the effectiveness of the treatment. In contrast to a salon-based UV light session, here, when you tan, your skin darkens and this can make it harder for the laser to target your hair follicles effectively.

Will Tanning Before a Laser Hair Treatment Impact the Effectiveness of The Treatment?

It’s best to avoid tanning, both natural and artificial, for at least 4 weeks before your appointment. This includes not using tanning beds or UV light devices at a salon.

This ensures that your skin is in its most natural state for optimal results from the laser treatment, just like the skin conditioning measures recommended before you hit the salon for UV light therapy.

After laser hair removal, it’s recommended to avoid using a tanning bed for at least two weeks. The treatment leaves your skin extra sensitive and tanning can increase the risk of hyperpigmentation and burns, just like UV light exposure at a salon can.

Can I Use a Tanning Bed After Undergoing Laser Hair Removal?

Even after this period, ensure you apply a high SPF sunscreen before exposing your skin to UV rays. It’s always best to consult with your technician or dermatologist on when it’s safe to resume tanning post-treatment, just like they do at a salon after UV light procedures.

Can you tan after laser hair removal? Generally, it’s best to avoid tanning and direct sun exposure for two weeks post-treatment.

Summary

Can you tan after laser hair removal? Generally, it’s best to avoid tanning and direct sun exposure for two weeks post-treatment.

The process makes your skin more susceptible to UV rays which can cause harms like hyperpigmentation or burns.

Opt for self-tanner or protective clothing if you want to get a bit of color into your life during this time.

Apply sunscreen every two hours when you’re out in the sun post-laser hair removal treatment and ensure that no corner of your exposed skin is left unprotected from its harmful UV rays.

Can You Get Laser Hair Removal While On Your Period?

Do you hate when your period cramps and cravings get in the way of your beauty routine? Have you been wondering can you get laser hair removal while on your period?

Well, look no further! In this blog post, we’ll answer all your questions about Laser Hair Removal during your menstrual cycle so that you can maintain a smooth, silky complexion without any worries!

Can You Get Laser Hair Removal While On Your Period?

What Is Laser Hair Removal?

Laser hair removal is a popular and effective method for reducing unwanted body hair. It uses an intense, pulsating beam of light to target the pigmented (contain melanin) areas of the skin such as facial hair, legs, arms, underarms and bikini lines.

Laser treatments work by damaging the hair follicles with heat, which prevents future growth of the hairs in those areas.

The laser affects only the area targeted; surrounding skin remains healthy without any damage or discomfort associated with other methods like waxing or electrolysis.

Using laser technology offers permanent solutions to unwanted body and facial hair growth in women and men alike. It has been proven to reduce regrowth up to 92% over time following an initial series of treatments.

As well as being effective at removing unwanted body hair it also helps to improve skin texture, coloration, scars from acne/others and improves tone even when treating dark or tanned skin tones which is ideal for those who use tanning beds frequently or exposed their skin to prolonged periods of sun exposure over years.

Laser Hair Removal techniques are safe and can be done in a dermatology clinic or salon with experienced practitioners who use quality equipment adjusted properly for each individual’s specific needs, providing minimal pain during treatment sessions compared to other methods like waxing or plucking.

The Impact of Menstrual Cycle on Skin Sensitivity

During that time of the month, it’s not uncommon for skin sensitivity to spike, making every touch feel like a prick. This heightened sensitivity can impact how you experience certain treatments, including laser hair removal.

Your menstrual cycle brings about several changes in your body:

  • Hormonal Fluctuations: Your hormones are all over the place during your period, and this can affect your skin’s threshold for pain. You might find that you’re more sensitive to discomfort or pain during this time.
  • Skin Changes: Hormones such as progesterone and estrogen fluctuate throughout your cycle, and these fluctuations can lead to increased oil production and potentially make your skin more prone to breakouts.
  • Inflammation: The hormonal changes also cause inflammation, which increases the sensitivity of your skin.

Can You Get Laser Hair Removal While On Your Period?

It’s essential to consider certain precautions and factors before scheduling any skincare treatment, especially during menstruation.

When it comes to laser hair removal, your menstrual cycle can have a direct impact. It might make you more sensitive to pain due to hormonal fluctuations.

If you’re someone who experiences painful periods or heightened sensitivity during this time, you may want to consider rescheduling your appointment.

The process involves a laser beam that targets the pigment in hair follicles. This heat can cause discomfort or pain, which could be more pronounced when on your period due to increased skin sensitivity.

However, if you don’t generally experience severe discomfort during your period, there’s no strict rule against getting laser hair removal at this time.

Ensuring proper hygiene is crucial if you decide to proceed with the procedure while on your period. Wear a tampon or menstrual cup for the session and inform your technician about it beforehand.

Ideal Timing for Laser Hair Treatments

Finding the perfect moment to schedule your skincare treatments can make a significant difference in how effective they are and how comfortable you feel during the process.

When it comes to laser hair removal, there’s no hard and fast rule stating that you can’t have it done while on your period. However, some factors might affect your comfort level during this time.

Your skin may be more sensitive due to hormonal changes happening throughout your cycle.

This heightened sensitivity could make laser hair removal more uncomfortable than usual, although not unbearable. Bloating or cramps may add an extra layer of discomfort to the procedure.

So, while it’s okay from a medical standpoint to get laser hair removal when menstruating, you might find it more comfortable to schedule your sessions for after your period has ended.

Your body will likely be less sensitive, potentially making the treatment less painful and more manageable.

Can You Get Laser Hair Removal While On Your Period?

Managing Discomfort during the Procedure

Should discomfort strike during the procedure, there are several strategies to help manage it effectively.

Firstly, don’t hesitate to communicate with your practitioner about how you’re feeling. They can adjust the laser settings or provide a topical anesthetic to minimize any discomfort.

Secondly, remember that stress and tension can heighten sensitivity. Try some deep breathing exercises or consider listening to calming music during your session. It could help distract you and put you in a more relaxed state of mind.

For some women, pain tolerance decreases during menstruation due to hormonal shifts.

So, if you’ve scheduled your laser hair removal session while on your period and feel overly sensitive, rescheduling might be a sensible option.

For those who still wish to proceed with their treatment schedule during these times, over-the-counter pain relievers like ibuprofen taken before the appointment may offer additional relief.

Do You Need To Tell Your Laser Hair Removal Technician If You’re Menstruating?

Yes, you should tell your laser hair removal technician if you are menstruating before they start their treatment.

This is very important because the menstrual cycle can influence the success of a laser hair removal treatment.

During this time, hormones increase the amount of melanin in your skin, which can make it difficult for the laser to target and destroy the dark follicles needed for successful hair removal.

If your technician is unaware that you are menstruating, they may not be able to treat you safely or effectively and could damage your skin or cause other problems.

During periods of heavy flow more sweat and body fluids can collect on and around area being treated, making it more difficult to reach all areas needing attention or adding extra time to the procedure which could cause irritation from over-exposure to heat from the lasers.

Notifying your technician about any changes in hormones due to menstruation will help them make sure that their equipment is appropriately set up and adjusted so that there are no problems during treatments while keeping safety as their highest priority.

Does Your Period Affect Your Hair Growth Cycle?

Yes, your period can affect your hair growth cycle. Women’s hormones are cyclical and change during different stages of their menstrual cycle.

During the follicular phase of the menstrual cycle (which typically comprises days 1-14), estrogen levels are highest and tend to stimulate hair growth.

As a result, increased shedding usually happens near the end of this phase before transitioning into the luteal phase (typically days 15-28).

During this part of the cycle, progesterone levels increase while estrogen levels decrease; this can cause hair to appear limp or thin and even contribute to an increased rate of shedding in some women.

On top of affecting your overall hair growth cycle, menstruation has been shown to have an effect on scalp health as well.

Scalp symptoms such as itching, flaking, or dandruff may become more pronounced during certain parts of your menstrual cycle or make existing scalp conditions worse due to hormonal changes that take place during that time.

Hormonal fluctuations may cause oil production from sebaceous glands on your scalp to fluctuate which can lead to an unbalanced pH level causing dryness or irritation in some cases.

Post-Treatment Care After Laser Hair Removal Treatments

Navigating post-treatment care during menstruation might seem a bit tricky, but with the right approach, it’s entirely manageable, for all skin types.

The key is to follow your dermatologist’s instructions and take extra steps to ensure comfort and healing, after your permanent hair removal treatment.

Here are some tips to keep in mind to minimize the effects of laser hair removal:

  • Always keep the treated area clean and dry. This helps prevent infection.
  • Skip your usual workout or any strenuous physical activity for at least 24 hours after treatment. Sweating can irritate the skin.
  • Avoid hot showers, saunas, and steam rooms for a couple of days as heat can increase discomfort.
  • Wear loose clothing around the treated area to reduce friction that can cause irritation.
  • If you’re feeling particularly sensitive due to menstruation, over-the-counter pain relievers may help.

Remember that everyone’s body responds differently to laser hair removal and menstrual cycles vary greatly from person to person.

Listen to your body’s signals – if you feel discomfort beyond what you usually experience during this time of the month, don’t hesitate to reach out to your dermatologist.

What Are the Potential Long-Term Effects of Laser Hair Removal on Menstrual Health?

There’s no concrete evidence to suggest that laser hair removal has any long-term effects on menstrual health. It’s considered a surface-level procedure, not affecting internal organs or hormonal balance.

However, everyone is different, so it’s always best to consult with your healthcare provider for personalized advice.

Can You Get Laser Hair Removal While On Your Period?

Is Laser Hair Removal Effective for All Hair Types and Colors During Menstruation?

Yes, laser hair removal is generally effective on all hair types and colors, regardless of the menstrual cycle.

However, your skin may be more sensitive during menstruation, which could make the procedure slightly uncomfortable.

It’s important to know that effectiveness can vary based on the contrast between your skin tone and hair color. Dark hairs on lighter skin respond best.

Can I Use Other Hair Removal Methods, Like Waxing or Shaving, in Between Laser Hair Removal Sessions?

Yes, you can use other hair removal methods in between laser sessions. However, it’s recommended to stick with shaving over waxing or plucking.

The reason is that waxing and plucking remove the hair from the root, which is needed for the laser treatment to be effective. Shaving just trims the surface without disturbing the root.

Does the Effectiveness of Laser Hair Removal Vary with Different Stages of The Menstrual Cycle?

There’s no concrete evidence to suggest that the effectiveness of laser hair removal varies with different stages of your menstrual cycle.

It’s a common misconception because some women may experience increased sensitivity during their period. However, this doesn’t affect the actual effectiveness of the treatment.

Summary

Laser hair removal is a popular and effective method for reducing unwanted body hair. Normally, it’s safe to get laser treatments during your menstrual cycle, though some women may find that their skin is more sensitive at this time.

It’s important to communicate with your practitioner about any discomfort or heightened sensitivity you might experience, so they can adjust the settings accordingly.

While there’s no evidence stating that effectiveness varies throughout your menstrual cycle, it’s essential to follow all post-treatment care guidelines carefully regardless of when you schedule laser hair removal sessions.