Can Blonde Eyelashes Get Extensions?

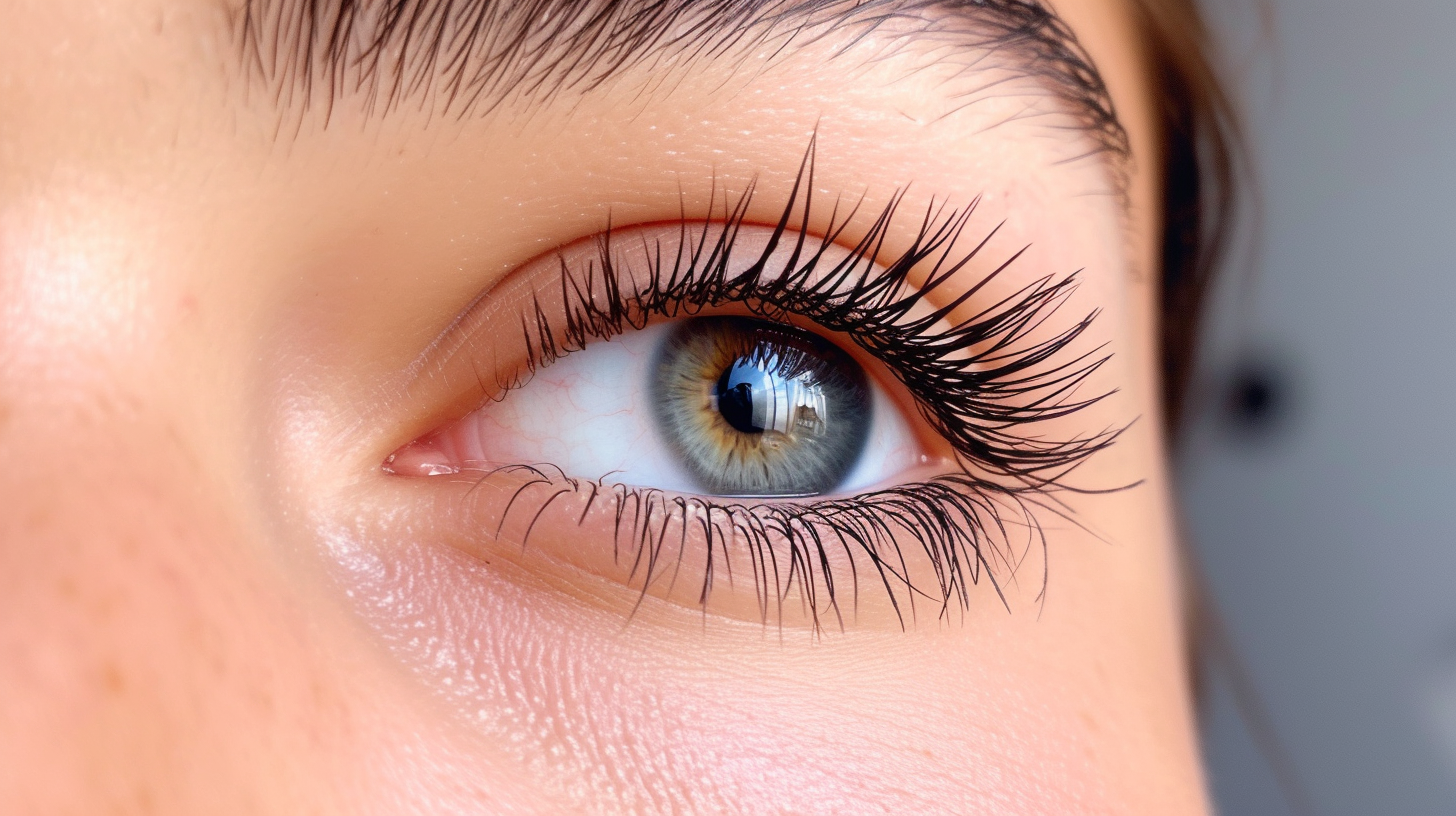
As the saying goes, ‘beauty is in the eye of the beholder,’ and for many, enhancing their natural features, including eyelashes, is a key part of feeling beautiful.

If you’ve got blonde lashes and are wondering if extensions are a possibility, the answer might surprise you. While you might think your lighter lashes pose a unique challenge, there’s a world of options available for every shade and type.

Can Blonde Eyelashes Get Extensions?

What Are Eyelash Extensions?

Essentially, they’re semi-permanent fibers attached to your natural lashes, designed to make your eyelashes fuller, longer, and more defined without the need for mascara.

You’ll find they come in various materials, including synthetic, silk, and mink, each offering a different look and feel.

As you explore extension types, you’ll notice that they also vary in length, curl, and color, allowing for a customized appearance that can range from subtle and natural to dramatic and bold.

This versatility is what makes eyelash extensions a favorite among beauty enthusiasts.

Choosing the Right Extensions

Choosing the right extensions for your blonde lashes isn’t just about color. You’ll also need to consider the length and volume that best complement your natural lashes.

Extension Color Matching

When selecting the right blonde eyelash extensions, consider your natural lash color for a seamless blend. Not all blondes are the same; some have golden undertones, while others might lean towards ashier hues.

Therefore, matching the extensions to your natural lash color ensures they look as though they’re genuinely yours.

Natural Lash Color Recommended Extension Shade
Golden Blonde Honey or Golden Blonde
Ash Blonde Platinum or Ash Blonde
Strawberry Blonde Light Auburn or Strawberry

Length and Volume Considerations

You’ll also need to consider the length and volume of the extensions to ensure they complement your natural lashes perfectly. When choosing the right extensions, keep in mind:

  1. Extension Length: Opt for lengths that enhance your eyes without overpowering your natural lash line. Longer isn’t always better.
  2. Volume Choices: A fuller set can offer a dramatic look, but ensure it matches your lifestyle and the natural thickness of your lashes.
  3. Natural Growth: Consider your lashes’ growth cycle. Choosing extensions that mimic this can help maintain a balanced, natural appearance.
  4. Extension Durability: Heavier extensions mightn’t last as long on fine, blonde lashes. Opt for lighter, more durable options to ensure longevity and health of your natural lashes.

selecting the perfect blonde eyelash extensions

Maintenance and Care Tips

After selecting the perfect blonde eyelash extensions for your look, it’s essential to know how to maintain and care for them to ensure their longevity and the health of your natural lashes.

First and foremost, establish a gentle cleansing routine. Use a mild, oil-free cleanser to remove any buildup or makeup, ensuring you’re not weakening the adhesive.

Conduct allergy tests before application. Even if the extensions seem harmless, your skin might react differently.

Apply a small amount of the eyelash glue on your skin, preferably the inner wrist, and wait for any signs of irritation.

Preparing for Your Appointment

To ensure your blonde eyelash extensions appointment goes smoothly, start by thoroughly cleaning your lashes and removing any makeup.

This initial step is vital for the lash technician to work with a clean base, ensuring the best possible adhesion and overall results.

Beyond just cleaning your lashes, there are a few more steps you should take to prepare for your appointment.

Here are four key steps to prepare for your eyelash extensions appointment:

  1. Perform a patch test: If you’ve never had lash extensions before or if you have known skin sensitivities, it’s wise to schedule a patch test with your lash artist ahead of your main appointment. This can help ensure you don’t have an allergic reaction to the glue or any other products used during the application process.
  2. Avoid eye makeup: On the day of your appointment, come with completely clean and makeup-free eyes. This includes avoiding mascara, eyeliner, and any oily makeup removers that could leave a residue.
  3. Stay clear of caffeine: Try to avoid consuming caffeine before your appointment. Caffeine can make your eyelids flutter, which can complicate the application process.
  4. Communicate your preferences: Before your appointment, think about the look you’re aiming for with your extensions. Whether you want a natural look or something more dramatic, being clear about your expectations can help your technician select the right length, curl, and volume of lashes to use.

The Application Process

Now that you’re prepped for your appointment, let’s move on to how the application process unfolds.

First, you’ll need to choose the right extensions that match your desired look and lifestyle.

Then, we’ll walk you through the step-by-step application guide, followed by essential aftercare and maintenance tips to keep your blonde eyelash extensions looking fabulous.

Choosing the Right Extensions

Selecting the ideal blonde eyelash extensions involves understanding the application process to ensure they perfectly complement your look. Here are a few key considerations:

  1. Extension Trends: Keep an eye on current extension trends to choose a style that enhances your natural beauty without overwhelming your features.
  2. Material Matters: Different materials can affect both the appearance and comfort of your extensions. Options range from synthetic to silk to mink.
  3. Color Matching: For blonde lashes, finding the right shade is key. A professional can help you select the perfect color to blend seamlessly with your natural lashes.
  4. Test for Allergic Reactions: Before committing, it’s wise to test the glue or adhesive for any allergic reactions to avoid discomfort or health issues.

Carefully weighing these factors ensures your blonde eyelash extensions look natural and feel comfortable.

selecting the perfect blonde eyelash extensions

Step-by-Step Application Guide

Are you ready to transform your look with blonde eyelash extensions? Let’s dive into the step-by-step application process to ensure flawless results.

First, your lash technician will start with lash cleansing to remove any makeup, oil, or debris, ensuring a clean base for the extensions.

Start with this step to prevent any complications during the application.

Next, they’ll select the appropriate length and curl of blonde extensions to match your natural lashes.

Applying each extension one by one with precision and care, they’ll ensure each bond is secure and looks natural.

To minimize the risk of allergic reactions, they’ll use high-quality, hypoallergenic glue. Throughout the process, you’ll be asked about your comfort to ensure a pleasant experience.

Aftercare and Maintenance Tips

Following your successful application of blonde eyelash extensions, it’s essential to understand the aftercare and maintenance tips to keep them looking their best. Here’s a concise guide:

  1. Shower Precautions: Wait at least 48 hours before wetting your lashes. Use a gentle, oil-free cleanser and avoid direct water pressure on your extensions to prevent weakening the adhesive.
  2. Cosmetic Compatibility: Only use oil-free makeup and removers. Oils can dissolve the bonding agent, leading to premature lash loss.
  3. Avoid Rubbing: Gently pat your eyes dry after cleansing. Avoid rubbing or pulling on your extensions, as this can cause them to fall out or damage your natural lashes.
  4. Regular Combing: Use a clean spoolie brush to gently comb your extensions every morning to maintain a neat, unified look.

Aftercare Tips

You’ve got to consider your sleeping positions. It’s best to sleep on your back; this prevents your lashes from rubbing against your pillow and potentially getting tangled or falling out prematurely.

If you’re a side or stomach sleeper, try using a silk pillowcase to reduce friction.

Another critical factor to consider is cosmetic allergies. Always inform your lash technician about any sensitivities you may have to certain products.

After getting your extensions, it’s essential to avoid oil-based makeup removers and cleansers, as oil can weaken the adhesive bond of the lashes, causing them to fall out sooner. Instead, opt for gentle, oil-free cleansers and make sure to avoid rubbing your eyes.

You’ll also want to brush your extensions gently with a clean spoolie brush daily to keep them looking neat and untangled.

Avoid waterproof mascara, as it’s tough to remove and can lead to pulling on your extensions when trying to take it off. In fact, you might find you don’t need mascara at all with your new, fuller lashes.

Lastly, keep up with your refill appointments every 2-3 weeks. This will help maintain the fullness of your lashes and replace any that have naturally fallen out as part of the eyelash growth cycle.

Debunking Common Myths

Many believe that blonde eyelash extensions damage your natural lashes, but this is just one of the myths we’ll debunk today.

Let’s clear up some common misconceptions and set the record straight once and for all.

  1. Blonde Eyelash Extensions Cause Damage: The truth is when applied correctly by a professional, eyelash extensions don’t harm your natural lashes. Find a certified lash technician who understands the importance of selecting the right type of extension and adhesive for your unique lashes.
  2. Natural Shedding Means Extensions Are Harmful: Your eyelashes, like the hair on your head, go through a natural shedding cycle. You might notice a few lashes falling out, but don’t panic; this is normal. Eyelash extensions are attached to your existing lashes, so when natural shedding occurs, it might seem like the extensions are causing lash loss, but they’re not to blame.
  3. Extensions Prevent Lashes from Curling: Another myth is that you can’t achieve curling effects with extensions. On the contrary, one of the perks of eyelash extensions, especially for those with straight or blonde lashes, is the ability to add both length and curl. Your technician can help you choose the right type of curl to complement your natural beauty.
  4. Blonde Lashes Can’t Hold Extensions: Absolutely false! Blonde or lighter-colored lashes can support extensions just as well as darker lashes. The key is using the appropriate extension length and thickness to ensure they blend seamlessly and maintain the health of your natural lashes.

In essence, don’t let these myths deter you from enhancing your lashes. With the right care and a skilled technician, eyelash extensions can be a safe and beautiful addition to your look.

Conclusion

Absolutely, you can get eyelash extensions even if you have blonde lashes! Just ensure you choose the right shade and type to enhance your natural beauty. Remember, it’s all about finding the perfect match and following the aftercare tips to keep your extensions looking fabulous.

Don’t let common myths deter you; with proper application and care, your blonde lashes can flaunt stunning extensions. So, go ahead and book your appointment with confidence. You’re all set for a gorgeous transformation!

Can Brow Gel Be Used On Eyelashes?

You might not realize that the brow gel sitting in your makeup bag could double as an eyelash enhancer. While it’s not their primary use, exploring the versatility of beauty products can lead to some interesting discoveries.

Brow gels and eyelash products share similar formulations, but using them interchangeably comes with its own set of considerations.

Safety and effectiveness are paramount, and understanding the subtleties between these products could open up new possibilities in your beauty routine.

Can Brow Gel Be Used On Eyelashes?

Can Brow Gel Be Used On Eyelashes?

Brow gels are crafted with a purpose in mind: to shape, set, and sometimes tint the brows.

This mission is achieved through a careful blend of polymers, waxes, and sometimes fibers, which provide the hold and structure needed for brow hairs.

The formulation purpose of brow gel extends beyond mere aesthetics. It’s also about conditioning and protecting the hair.

Ingredients like glycerin, panthenol, and various oils are often included to nourish and moisturize both the hair and the underlying skin.

This dual focus on styling and care is what makes brow gel formulations so intriguing.

Now, when you consider applying the same product to your eyelashes, it’s the ingredient analysis that offers reassurance.

The polymers and waxes that give brows their shape are equally effective at defining lashes. Plus, the conditioning agents that keep brow hairs healthy can do the same for lashes, which are prone to drying out and breaking.

However, remember that while the basic components might be similar, the specific formulation purpose of brow gel is tailored to brows, not lashes.

This doesn’t mean it won’t work, but understanding the designed intent helps set realistic expectations about performance and outcomes.

Comparing Eyelash and Brow Products

When we delve into the comparison between eyelash and brow products, it’s clear that, despite their similarities, each is uniquely formulated to enhance different features effectively.

Let’s break down the main distinctions you’ll find between these two types of beauty products.

  1. Ingredient Differences

Brow gels often contain ingredients aimed at sculpting and holding hairs in place for an extended period, sometimes incorporating fibers to add volume.

They’re designed to withstand various activities without smudging or fading, thanks to their stronger hold.

Eyelash mascaras and serums typically focus on lengthening, volumizing, or curling lashes, with formulas that may include peptides for growth, waxes for shaping, and more flexible polymers to prevent flaking or smudging.

The formulation ensures that they’re gentle enough for the sensitive eye area but effective in enhancing the appearance of your lashes.

  1. Application Tools

The tools included with eyebrow and eyelash products also differ significantly to cater to the distinct application techniques required for each.

Brow products come with spoolies or small brushes designed for precision in shaping and defining the brows.

Eyelash products, however, feature various types of wands – from curved to tapered – specifically engineered to coat each lash evenly from root to tip, often designed to separate lashes and prevent clumps.

  1. Consistency and Texture

Generally, brow gels have a thicker consistency to provide a strong hold without stiffness, allowing for a more natural look.

Mascara, in contrast, has a creamier texture that glides smoothly over eyelashes, aiming to lengthen and volumize without creating a heavy or cakey appearance.

Benefits Of Using Brow Gel On Lashes

This dual-purpose usage isn’t just a hack but a testament to makeup innovation, allowing you to streamline your beauty products and potentially save on space and expenses.

One significant advantage is the uniformity it can bring to your appearance.

Using the same product on both your brows and eyelashes ensures that the color and texture match perfectly, creating a cohesive and natural look.

This can be particularly beneficial if you’re using tinted brow gel, as it can subtly enhance your lashes with the same hue, adding depth and definition without the need for mascara.

Brow gels are designed to provide hold and shape, qualities that are equally desirable for eyelashes.

When applied carefully, they can offer a light, natural lift and separation to your lashes, making them appear longer and fuller without the clumpiness often associated with mascara.

Benefits Of Using Brow Gel On Lashes

Safety Considerations and Risks

Before considering the crossover use of brow gel on your eyelashes, it’s crucial to weigh the safety implications and potential risks involved.

While the idea might seem convenient, especially if you’re aiming for a unified look or simply trying to save on beauty products, you should be aware of several concerns that could impact your health and comfort.

  1. Allergic Reactions: Not all brow gels are formulated with the same ingredients as those intended for eyelashes. Since the skin around your eyes and your eyelids are more sensitive than your brow area, you’re at a higher risk of developing allergic reactions. This could lead to redness, itching, and discomfort, not to mention the potential for more severe reactions depending on your sensitivity.
  2. Infection Risks: Your eyelashes serve as a protective barrier, keeping dust, debris, and harmful microorganisms away from your eyes. Using a product not specifically designed for eyelashes could compromise this barrier, increasing your risk of infections. This is particularly concerning if the brow gel isn’t non-comedogenic or if it’s applied too close to the lash line, where it could block the tiny oil glands, leading to irritation or even styes.
  3. Chemical Composition: Brow gels might contain chemicals that are too harsh for your eyes. For instance, some formulas might be fine for your brows but could cause stinging or burning sensations if they come into contact with your eyes. This discomfort can lead to rubbing or scratching, which irritates your skin further and increases your risk of eye infections.

Expert Tips and Application Techniques

To ensure the best outcome, let’s dive into some expert tips and application techniques for using brow gel on your eyelashes safely.

First off, color matching is crucial. Just as you’d select a brow gel that complements your natural brow color, you should do the same for your eyelashes.

If you’ve got lighter lashes, opt for a tinted brow gel that matches or slightly darkens them for a natural look. For those with darker lashes, a clear gel might be all you need to add definition without the heaviness of mascara.

Now, let’s talk about brush types. The applicator plays a significant role in how the product distributes across your lashes.

Typically, brow gels come with a spoolie brush, similar to a mascara wand, but the size and stiffness can vary.

For a precise application on your lashes, look for a brow gel with a smaller, more flexible brush. This will help you coat each lash evenly without clumps.

When applying the gel, start at the base of your eyelashes and wiggle the brush slightly as you move toward the tips.

This technique ensures that each lash is coated from root to tip, providing a more natural and lifted look.

Remember, less is more. You’re aiming for a subtle enhancement, so avoid over-applying the product. A light, even coat will do the trick.

you can use brow gel on your eyelashes

Conclusion

So, yes you can use brow gel on your eyelashes, but you should proceed with caution.

While the crossover use offers some benefits, like a unified look, it’s crucial to consider the formulation and safety risks.

Always check the ingredients and test for any adverse reactions. For the best results and to avoid any mishaps, follow expert tips and proper application techniques. Remember, your eyes are delicate, so whatever you choose to do, do it wisely.

Are Ceramides Good For Eyelashes?

You might be familiar with ceramides as a key ingredient in skincare, but did you know they’re also being touted for their potential benefits for eyelashes?

These lipid molecules, which play a  role in maintaining the skin’s barrier and retaining moisture, might offer similar advantages for lash health, promoting strength and preventing breakage.

Are Ceramides Good For Eyelashes?

What Are Ceramides?

Ceramides are naturally occurring lipids in your skin that help retain moisture and protect against environmental aggressors.

They’re an essential part of your skin’s barrier, keeping it hydrated and resilient.

The chemical structure of ceramides consists of a long-chain or sphingoid base linked to a fatty acid.

This unique combination allows ceramides to create a water-impermeable, protective layer to prevent excessive moisture loss from the skin.

Their structure is key to their function; it’s what enables ceramides to effectively lock in moisture and shield the skin from harmful elements.

As for ceramide sources, you’ll find these valuable lipids in both plant-based and animal-derived ingredients.

Common sources include soybeans, wheat germ, and rice bran, as well as dairy products and eggs.

These sources are often utilized in skincare formulations to enhance the ceramide content, aiming to mimic and support the skin’s natural lipid barrier.

It’s also possible to bolster your skin’s ceramide levels through diet and topical skincare products containing these potent lipids.

Ceramides and Skin Health

You might already know ceramides play a role in your eyelashes, but their benefits extend far beyond.

They’re key to hydrating your skin, strengthening its barrier, and offering anti-aging advantages.

Let’s explore how these effects contribute to healthier, more resilient skin.

Ceramides’ Role in Hydration

These lipid molecules are essential for your skin’s water balance, acting like the glue in the brick wall of your skin’s lipid layers. They lock in moisture, keeping your skin supple and hydrated.

Function Location Benefit
Hydration Lipid Layers Retains Moisture
Water Balance Skin Surface Prevents Dryness
Strengthening Skin Barrier Enhances Softness

Strengthening Barrier Function

A strong barrier function is vital for healthy skin, and incorporating ceramides into your skincare routine can significantly enhance this protective layer.

By augmenting lipid production, ceramides help to fortify your skin’s natural defenses against environmental impact.

This process is essential for maintaining a smooth, resilient surface that can better withstand external stressors.

To engage further, consider these points:

  • Ceramides boost your skin’s lipid production.
  • They protect against harmful environmental impact.
  • Strengthening the skin barrier reduces moisture loss.
  • Enhanced barrier function supports overall skin health.
  • Using products with ceramides can lead to more resilient skin.

The Role of Ceramides in Hair

Anti-Aging Benefits

When you integrate ceramides into your skincare routine, they don’t just strengthen your skin’s defense; they actively promote cellular renewal.

The Role of Ceramides in Hair

Ceramides act as hair strengthening agents, lock in moisture to prevent dryness, and enhance hair’s resilience against damage.

These properties support healthier-looking hair and suggest promising effects for the vitality of your eyelashes.

Ceramides: Hair Strengthening Agents

Ceramides serve as the backbone of hair’s strength, fortifying each strand from the inside out.

These lipid molecules play a vital role in hair health by:

  • Sealing cuticles to prevent damage
  • Enhancing elasticity to reduce breakage
  • Providing a protective barrier against environmental aggressors
  • Improving shine for a healthier appearance
  • Acting as a glue to bond hair fibers, increasing resilience

Ceramides’ unique ability to penetrate and reinforce the hair’s structure makes them an essential component in hair care formulations.

Moisture Retention Benefits

This moisture retention is vital, as it prevents your lashes from becoming dry and brittle, which can lead to breakage.

Ceramides act as a lipid replacement, filling in the gaps where natural lipids have been washed away or broken down.

This restores the moisture barrier and helps to protect your lashes from the adverse effects of humidity.

Whether you’re dealing with dry indoor air or the dampness of a rainy day, ceramides work to maintain the optimal moisture level in your lashes, ensuring they stay strong, supple, and healthy-looking, regardless of the environmental conditions.

Enhancing Hair Resilience

Beyond moisture retention, ceramides significantly boost the resilience of your lashes, making them less prone to damage and breakage.

When you’re aiming for that stunning look, you don’t want your efforts undone by brittle lashes. That’s where ceramides come into play.

They act like a shield, protecting your lashes from the harsh effects often brought on by styling and environmental stressors.

  • Protect against hair dyeing effects: Ceramides help minimize damage from color treatments, keeping your lashes strong.
  • Enhance protein treatments: They work hand in hand with proteins to fortify your lashes.
  • Reduce breakage: Regular use leads to fewer lashes falling out.
  • Improve elasticity: Your lashes can endure more bending and manipulation without snapping.
  • Shield from environmental damage: Ceramides offer an extra layer of protection against pollutants and harsh weather.

Benefits for Eyelashes

When it comes to eyelash growth and seeking natural alternatives, ceramides are a standout option.

Unlike harsh chemicals that can irritate the sensitive eye area, ceramides nurture and fortify lashes from the root.

This natural reinforcement encourages longer, healthier lash growth without the risk of adverse reactions often associated with synthetic growth serums.

To give you a clearer picture, here’s a quick rundown of the benefits ceramides offer your eyelashes:

Benefit Description Why It Matters
Hydration Ceramides help retain moisture, reducing dryness and brittleness. Less breakage, more flexibility
Natural Growth Support Reinforces the lash’s natural growth cycle, promoting thicker, longer lashes. Fuller, more attractive lashes
Protective Barrier Forms a protective layer against environmental damage like pollutants and harsh weather. Less damage, healthier lashes
Non-irritating Being a natural component of the skin, ceramides are less likely to irritate than synthetic alternatives. Safer for sensitive eye areas

benefits of ceramides for your eyelashes

Application Tips and Products

To effectively harness the benefits of ceramides for your eyelashes, choosing the right products and mastering their application is essential.

Ceramides, known for their capacity to restore and strengthen the skin’s barrier, can also provide remarkable benefits for your eyelashes, making them appear fuller and more resilient.

When selecting ceramide-infused products, consider product compatibility with your skin type and any other beauty products you’re using.

Consider these practical tips to get the most out of your ceramide eyelash products:

  • Choose a product specifically designed for eyelashes: Not all ceramide products are suitable for the delicate eye area. Look for serums or conditioners that mention eyelash use explicitly.
  • Cleanse your eyelids thoroughly: Before application, ensure your eyelids and lashes are clean and free from makeup or other residues to allow better absorption.
  • Apply with precision: Use the applicator provided or a clean, fine-tipped brush to apply the product directly to the lash line, avoiding direct contact with the eyes.
  • Be consistent with application frequency: Follow the manufacturer’s recommendations, usually once or twice daily, for the best results. Consistency is key to seeing improvements.
  • Combine with a balanced diet: For optimal eyelash health, complement your topical ceramide application with a diet rich in vitamins and minerals that support hair growth.

Safety and Considerations

Ceramides, though generally safe and beneficial for most, can sometimes trigger allergic reactions in certain individuals.

It’s essential to perform a patch test before fully incorporating a new ceramide-based product into your routine.

Apply a small amount of the product to a less sensitive area of your skin, like the inner forearm, and wait 24 to 48 hours for any signs of irritation or allergic reaction.

Product compatibility is another vital consideration. Not all ceramide-containing products are formulated equally or with the same concentration of active ingredients.

It’s important to choose products that are specifically designed for use around the sensitive eye area to minimize potential irritation.

Factor to Consider Why It’s Important
Allergic Reactions To prevent unwanted side effects like redness, swelling, or itching.
Product Compatibility Ensures the product is safe and formulated for the delicate eye area.

Conclusion

In conclusion, ceramides are a game-changer for your eyelashes, enhancing their health and appearance. They’re not just great for your skin, but they work wonders on hair fibers, including those precious lashes.

By incorporating ceramide-infused products into your routine, you’ll notice stronger, more resilient eyelashes.

Just remember to apply them carefully and keep an eye on any sensitivities. With the right approach, you’re on your way to batting fuller, healthier lashes in no time.

What Dissolves Eyelash Glue?

Just as the key unlocks the door to a hidden garden, the right solvent unlocks the bond of eyelash glue, freeing your natural lashes from their decorative confines.

You’ve probably experienced the stubborn grip of eyelash adhesive and wondered what magic potion could gently dissolve this bond without harming your delicate eye area. From natural oils that break down the adhesive to specialized commercial removers designed for this very purpose, various solutions exist.

But the question remains: which method is the most effective and gentle on your eyes?

What Dissolves Eyelash Glue?

What Dissolves Eyelash Glue?

Natural oils can effortlessly break down eyelash glue, making removal a breeze. These oils have a unique oil composition that interacts with the adhesive properties of the glue, weakening its bond without harming your skin or natural lashes.

It’s not just about slathering any oil over your eyes, though. The application techniques are key to ensuring effective and safe removal.

First, you’ll want to choose the right oil. Oils like coconut, olive, and almond are popular for their gentle yet effective properties.

Their molecular structure allows them to penetrate the glue, softening it for easy removal. Before you start, ensure your hands and face are clean to prevent any unwanted reactions or infections.

Apply the oil using a cotton swab or pad, gently dabbing it along the lash line where the glue is.

Avoid rubbing, as this can irritate your eyes and damage your natural lashes. Let the oil sit for a few minutes; this gives it time to work its magic on the glue.

You might need to reapply a small amount if you find the glue particularly stubborn.

Once the glue has softened, use a clean cotton swab to gently push down on the lash band, encouraging it to lift away from your skin.

If any resistance is met, apply a bit more oil and wait a few more minutes. Remember, patience is key; rushing can lead to lash damage or irritation.

This method isn’t only effective but also nourishes your skin and lashes thanks to the natural properties of the oils.

Plus, it’s a great way to avoid harsh chemicals that can sometimes be found in commercial removers.

Commercial Removers Explained

While natural oils offer a gentle way to dissolve eyelash glue, commercial removers provide a more potent solution for those tough-to-remove adhesives.

These specialized products are formulated to tackle even the most stubborn glue, ensuring you can safely and effectively remove your lash extensions or strip lashes without damaging your natural lashes.

When choosing a commercial eyelash glue remover, ingredient safety should be your top priority.

Look for products that are ophthalmologist-tested and free from harsh chemicals that could irritate your eyes. It’s also important to follow application tips carefully to avoid any potential harm.

Here’s a quick guide to help you understand commercial removers better:

Type Ingredient Safety Application Tips
Gel High – Usually free from harsh chemicals Apply with a cotton swab and let sit before wiping away
Cream Moderate – May contain more emollients Gently massage onto lash line, then rinse with water
Liquid Varies – Check for non-irritating formulas Use with a precision applicator to avoid getting into eyes
Oil-based High – Often contains nourishing oils Can be more gentle, but ensure it’s safe for eye use
Solvent Low to Moderate – Potent chemicals Apply carefully, avoiding direct contact with the eye

effective method for removing eyelash glue

Steam and Warmth Method

Another effective method for removing eyelash glue involves using steam and warmth to gently loosen the adhesive.

This technique is simple and can be quite soothing, but you must follow certain safety precautions to avoid any potential skin irritation or damage to your eyes.

To start, fill a bowl with steaming hot water, ensuring it’s not too hot to prevent steam burns. Drape a towel over your head and the bowl to trap the steam, and hold your face over the bowl at a safe distance.

Allow the steam to envelope your face for about 10 to 15 minutes. The warmth and moisture will help soften the eyelash glue, making it easier to remove without pulling or tugging on your delicate lashes.

After steaming, you can gently wipe your lashes with a soft, damp cloth or cotton pad. Be sure to use gentle application techniques to avoid damaging your natural lashes or irritating your skin.

Apply a light touch, and if the glue isn’t coming off easily, you may need to repeat the steaming process for a bit longer.

Micellar Water Benefits

Micellar water, renowned for its gentle yet effective cleansing properties, can also be a game-changer in removing stubborn eyelash glue.

You’ve probably heard about its magic in makeup cleansing, but its benefits extend far beyond just wiping away your daily mascara and foundation.

When you’re struggling with the remnants of lash adhesive, reaching for micellar water can make a difference, without the harshness that other removers might bring to the table.

This unique solution works because of micelles, tiny oil molecules suspended in soft water that act like magnets for dirt, oil, and makeup.

When you apply it to your skin with a cotton pad, these micelles cling to and lift away impurities, including the pesky glue holding your falsies in place.

What’s remarkable is that it does this without drying out your skin. In fact, micellar water is a champion of skin hydration, maintaining the moisture balance so crucial after a long day of wearing makeup.

Its no-rinse formula means you’re not stripping your skin of its natural oils, which can often lead to dryness or irritation.

This makes micellar water an excellent choice for all skin types, even those with sensitive skin. You’ll find that with regular use, not only does it help in makeup cleansing but it also leaves your skin feeling refreshed, soft, and hydrated.

For those looking to remove eyelash glue

Homemade Solutions Insights

For those looking to remove eyelash glue without resorting to store-bought products, homemade solutions can offer a safe and effective alternative.

You’ll find that with a few ingredients from your kitchen, you can create powerful mixtures that tackle the stubborn adhesive holding your falsies in place.

Among the most popular and effective ingredients are vinegar and baking soda, both known for their unique dissolving properties.

Here’s a closer look at how you can use these household staples to bid farewell to stubborn eyelash glue:

  1. Vinegar Effectiveness: Vinegar, especially white vinegar, is acclaimed for its ability to break down adhesives. To use, simply soak a cotton ball in vinegar and gently press it against your lash line. The acidity in vinegar helps to dissolve the glue, making it easier to remove the lashes without harsh rubbing. Let it sit for a few minutes before you attempt to peel off the lashes gently.
  2. Baking Soda Option: Baking soda, when mixed with a small amount of water, creates a paste that can be applied directly to the lash line. The paste works by softening the glue, making the removal process less damaging to your natural lashes. After applying, let it sit for several minutes, then wash off with warm water.
  3. Combination Method: For even more effectiveness, consider combining vinegar and baking soda. Apply the vinegar first to soften the glue, then follow up with the baking soda paste for a thorough cleanse. This one-two punch is especially useful for removing waterproof eyelash adhesives.

Conclusion

So, you’ve got a few great options to dissolve that stubborn eyelash glue. Whether you lean towards natural oils, grab a commercial remover, use steam and warmth, try micellar water, or whip up a homemade solution, you’re covered.

Each method comes with its perks, tailored to your preferences and what you’ve got on hand. Just remember, gently does it to keep your lashes and skin happy.

Now, you’re all set to tackle any eyelash adhesive with ease!

How Long Do Eyelash Perms Last?

Like a well-crafted novel that holds its intrigue until the final page, the lifespan of an eyelash perm can be surprisingly enduring, yet varies significantly.

You’ve likely invested in an eyelash perm to enhance your natural beauty with those effortlessly curled lashes, but the question remains: how long can you expect to enjoy the fruits of this beauty treatment?

The answer isn’t as straightforward as you might hope, influenced by several factors from your natural lash cycle to the care routine you follow.

Unpacking these elements not only illuminates the durability of your lash perm but also guides you towards maximizing its lifespan.

How Long Do Eyelash Perms Last?

How Long Do Eyelash Perms Last?

Eyelash perms, offering a semi-permanent curl to your lashes, can transform your daily beauty routine by enhancing your natural eye shape.

This beauty treatment bends your lashes upwards, making them appear longer and your eyes more open and bright.

However, as you’re considering diving into this trend, it’s essential to understand not just the allure but also the safety concerns and technique variations involved.

First off, the safety of your eyes can’t be overstated. You’ve got to ensure you’re getting this procedure done at a reputable salon that adheres to stringent hygiene practices.

The chemicals used, while generally safe, can cause irritation or harm if they come into contact with your skin or eyes.

Discuss any allergies or sensitivities with your technician beforehand. Don’t shy away from asking about their experience and the precautions they take to safeguard your eyes.

Average Duration of Results

Typically, you can expect your eyelash perm to last between four to six weeks, depending on your natural lash growth cycle.

This duration ensures that your lashes maintain their curl and lift, giving you that wide-eyed, refreshed look without the daily need for curling tools or mascara.

However, as your lashes follow their natural shedding and regrowth cycle, the permed lashes will eventually shed, and new, untreated lashes will take their place.

To keep your lashes looking their best, it’s important to understand the reapplication process. Here are four key points to consider:

  1. Initial Consultation: Before getting a reapplication, it’s advisable to undergo another consultation. Your lash technician will assess the health of your lashes and determine if they’re ready for another perm.
  2. Timing: Ideally, you should wait until most of the permed lashes have shed, and new growth is visible. This usually aligns with the four to six-week mark.
  3. Lash Care: Proper aftercare following your perm can extend the life of your curl. Your technician will provide specific instructions, which may include avoiding water and makeup near the eyes for a certain period.
  4. Booking in Advance: Given the popularity of eyelash perms, securing an appointment for a reapplication might require planning. It’s wise to book your next session at the end of your initial appointment.

Factors Influencing Longevity

Your body’s natural hormonal fluctuations can play a significant role in the health and lifecycle of your eyelashes, just like with the hair on your head.

For instance, during pregnancy or menopause, you might notice your perm doesn’t hold as long or your lashes seem to have a mind of their own.

This is because hormones can affect hair texture and growth cycles, impacting how well and how long your perm lasts.

Another factor is seasonal effects. The weather and the season can greatly influence the longevity of your lash perm.

High humidity or dry, windy conditions can affect how your lashes hold their curl. In humid environments, your lashes might fall flat quicker than expected, while in dry conditions, they might stay curled longer but become more brittle.

Maintenance Tips For Permed Eyelashes

Maintenance Tips For Permed Eyelashes

To ensure your eyelash perm remains vibrant and long-lasting, it’s crucial to follow a few key maintenance tips.

Proper care isn’t just about what you do; it’s also about what you avoid. Keeping your permed lashes looking their best involves a mix of savvy product selection and smart aftercare practices.

Below, you’ll find four essential tips to help you maximize the lifespan of your eyelash perm.

  1. Choose Your Products Wisely:

Not every beauty product is friendly to your permed lashes. You’ll want to steer clear of oil-based makeup removers and cleansers, as they can weaken the perm’s hold. Opt for gentle, oil-free options that keep your lashes intact.

  1. Invest in Quality Aftercare Products:

Aftercare products specifically designed for permed lashes can make a world of difference. Look for serums and conditioners that nourish and strengthen your lashes, ensuring they remain healthy and permed for as long as possible.

  1. Avoid Water and Steam:

For the first 24 to 48 hours after your perm, keep your lashes dry and free from steam. Water can deactivate the perm solution before it’s fully set, leading to droopy lashes instead of that alluring curl.

  1. Be Gentle:

When you’re washing your face or removing makeup, treat your lashes with extra care. Avoid rubbing or pulling on them, as this can cause the perm to relax prematurely. Gentle strokes and soft pads are your best friends.

Signs of Fading

While proper maintenance can significantly extend the life of your eyelash perm, it’s important to recognize when your lashes begin to show signs of fading.

As time passes, even the most meticulously cared-for permed lashes will eventually start to return to their pre-perm state.

Knowing the signs of fading can help you decide when it’s time for a touch-up or a completely new perm.

One of the first indicators that your eyelash perm is losing its vigor is a decrease in curl tightness. Your once beautifully curled lashes might start to look less pronounced, taking on a more relaxed shape.

This is a natural part of the perm’s lifecycle, as the bonds that were restructured during the perming process begin to weaken.

Lash brittleness is another sign you can’t ignore. If you notice your lashes becoming more fragile or breaking more easily than before, it’s a clear indication that the perm chemicals, over time, have started to affect them.

This brittleness can’t only diminish the appearance of your lashes but also their health.

Color changes in your lashes can also signal fading. If your lashes start to appear lighter or if you notice any discoloration, this could be a result of the perming solution altering the natural pigmentation of your lashes over time.

When you start to notice these signs, it’s important not to panic. Instead, view them as your cue to schedule another appointment.

With timely touch-ups, you can maintain your desired look and keep your lashes looking their best.

keep your lashes looking their best

Conclusion

In conclusion, your eyelash perm can last anywhere from 4 to 6 weeks, depending on factors like your lash cycle and how well you care for them. To extend the life of your perm, avoid oil-based products and be gentle with your lashes.

You’ll notice the curl beginning to relax when it’s time for a touch-up. Remember, keeping up with maintenance tips can significantly prolong those beautifully curled lashes, giving you that eye-catching look for longer.